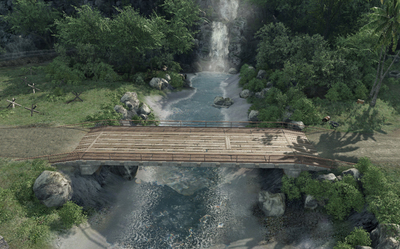
Also, if you want, have a look at the particle tutorial to learn how to add particle effects to your level, with particles you can enhance your river, by placing foam particle entities to make the effect of flowing water even more real.
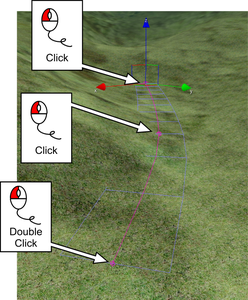
First click on the terrain will create the first point.
Second click will create the middle point of the river.
Double-clicking a third time will complete the river.
Do not worry about parts of the river disappearing in the terrain, we will adjust that later.
Later you can adjust the shape, add more points/remove points by clicking the Edit button in the Shape Editing section.
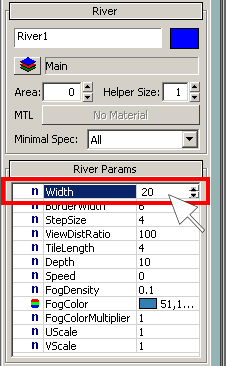
To build the river bed set the width of the river to 20 and press the Align Height Map button.

This adjusts the height of the terrain to the river shape and height – a very handy tool to shape terrain for other purposes, too, and can also be done with the Road tool.
Now set the width of the river to 10. With the river shape selected move the entire shape a little bit down by clicking on the yellow Y axis helper object line, holding the left mouse button and moving the mouse towards you.
Next, press again the Align Height Map button again.
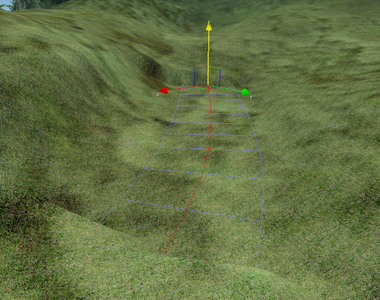
The river will always be a flat plane that, by default, hovers in the air. Rotate it to make it flow downhill.
Also, to make the river look like it is flowing along the terrain, it’s a nice idea to adjust the terrain beside the river. See the terrain editing tutorial on how to do this.
To make a 10 meter wide river blend with the terrain, simply set its width to 20 or 40 this will make the river wide enough so no gaps with the surrounding terrain will be visible.
Select the material and assign it with the top left button in the material editor.
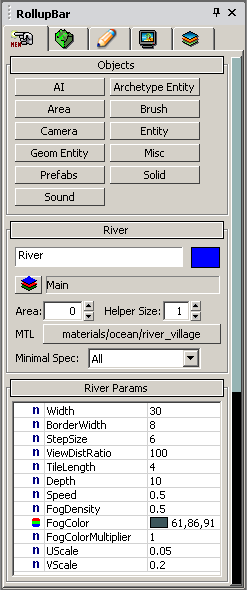
Width = 30
BorderWidth = 8
StepSize = 6
ViewDistRatio = 100
TileLength = 4
Depth = 10
Speed = 0.5
FogDensity = 0.5
FogColor = 61,86,91
FogColorMultiplier = 0.1
UScale = 0.05
VScale = 0.2
Once you have everything setup the river should flow gently. To enhance the look of the river obviously the ground material needs to be painted with an appropriate texture and vegetation added.
Some things to experiment with:
To make the river flow down from a mountain to the ocean, the river shape needs to be rotated (only use small Z values like 0.5 or 1).