In this tutorial you will learn the basic functions of the particle system, and more specifically, how to create a fire effect.
In preparation for the tutorial, start the Sandbox2 editor and open any level.
Most data in the CryENGINE®2 is handled and stored in libraries. The particle effect libraries are stored in your game folder, under Game/Libs/Particles.
To create a particle effect, you start with preparing a new particle library.
Open Database View found in the Open View Pane submenu of the View menu.
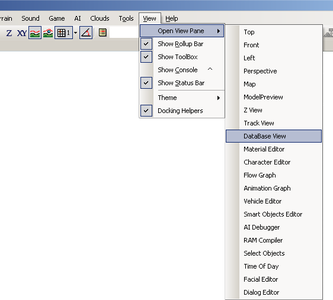
The Database View will appear.
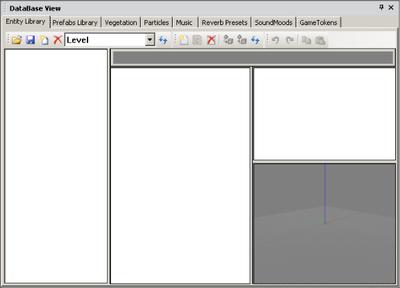
Before you create a particle you need to choose a library in which to place it. The best way to do this is to create our own library first.
In Database View, within the tabs at the top of the window, you will see the tab Particles. This is where all particle libraries are found.

The default library called Level should be active. You can create as many particle libraries as you need. They will each be saved as a separate file in your game folder.
Select the Particles tab and press Add Library, to create a new library.

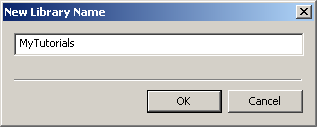
In the New Library Name window, enter the name for your library as "MyTutorials", as shown below.
Click the Add New Item button to add a new particle effect. Every effect will be organized in groups. As you have no groups yet you have to create a new group too.

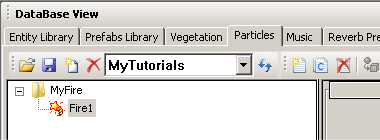
In the New Particle Name window create a Group as “MyFire” and a particle named “Fire1”
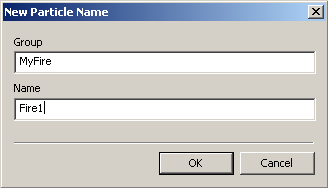
The new particle will appear on your particle list. Now, you’re ready to work on it!
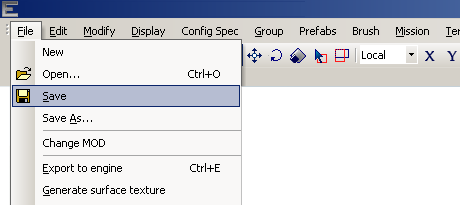
Click File/Save to save your progress.
You will need to prepare your textures before you start making new effects. However, this tutorial will use pre-prepared textures and focuses on the different texture types.
The default location to save textures for particle is the folder Game\Textures\Sprites.
Make sure the particle Fire1 is currently selected.

In the Appearance tab (located next to the particle browser list), click on the open folder icon next to the texture input box.

Now select in Game\Textures\Sprites the texture called fire_ball6.dds. The path of the texture will appear in the Texture input box. You can check the texture when you hover the mouse cursor over the input box.
To align the particle direction to the sprite’s movement direction turn on the Orient To Velocity switch.

The next step is about the life time of the particle. To create a continuous fire, click on the Continuous switch within the Emitter section of the particle properties.

To have each particle raise higher set the Particle Life Time to 3, and to have more than one particle appear at any time set the Count (of visible particles at the same time) to 10.
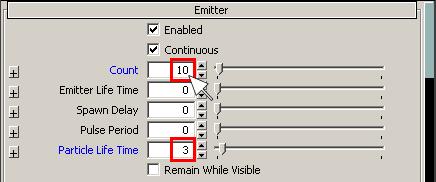
Keep the other values at their default (Emitter Life Time 0, Spawn Delay 0, Pulse Period *0*).
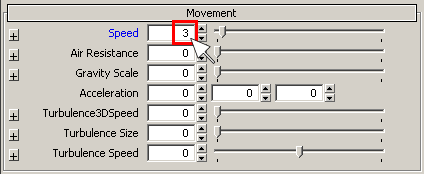
Select in the Movement pane the parameter Speed and set it to 3 to speed up the particle.
To place your effect in the level, you need to drag the effect from the particle browser list into the level. But, before you do this, activate the Select and Move tool on the editor toolbar and turn on Follow Terrain and Snap to Objects to make the placement easier.

Now drag and drop the “Fire1” particle effect into the level.
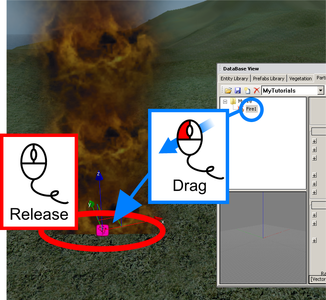
You can see your particle spawning from the emitter continuously. But right now it still looks far from being a real fire. The next step is to tweak more parameters in the Particle editor and improve the appearance.
Note:
You can use the Goto Selected Object button to align the camera position to be just in front of the emitter.

Save your scene once more before go to next step.
To get a more “firelike” look, you will need to tweak a few more parameters within the particle.
We will take a look at:
Go to the Emitter pane in left top of the parameter lists. If the Emitter Life Time is set to 0, particles are spawning infinitely until the emitter is disabled or deleted.
Set Particle Life Time to 1. Your particle should change its look as shown below.
The parameter Count controls how many particles are alive in the scene at any time. If its set to 10, at the time particle number 11 is spawned, particle number 1 will disappear.
Particle life time controls the life time for each particle. If it’s set to 3, particles die 3 seconds after they were spawned.
Up until now, all particles were spawned exactly in the same way – this doesn’t look natural. To add some randomness click on the little + button in front of the Particle Life Time parameter to open its additional parameters.
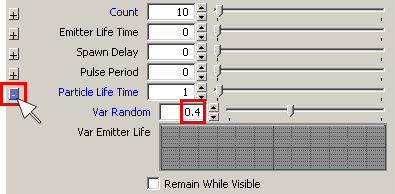
Set the Particle Life Time Var Random to 0.4.
Your particle will start to look a little more irregular now. The Var Random parameter exists for almost all parameters. The randomness is measured from 0 to 1, (meaning 0% to 100%).
If the Particle Life Time is set as 10 (sec), and the Var Random value is set to 1, the particle life time is randomized to be between 0 to 20 sec(+/- 100%). If Var Random is set to 0.3, the particle life time is randomized to between 7 and 13 seconds (+/- 30%).
For now though, keep the settings as shown.
Don’t forget to save your level from time to time.
Go to the Lighting pane and add the following settings:
Set Diffuse Lighting to 0.
Set Diffuse Backlighting to 0.
Set Emissive Lighting to 3.
Set Emissive HDR Dynamic to 3.
Your Particle will start to glow as shown:
Diffuse Lighting is the most basic lighting parameter for sprites. It controls how much the sprite is influenced by any dynamic or ambient light in the level. Usually, you have to set any appropriate value for this (like 0.7). But in this case of a fire which can't actually be lit, you should set this value to 0. Diffuse Backlighting is a simple parameter to add some brightness to the particle (often called 'Ambient' or 'Incandescence' in common 3D software). By increasing this value, you can make a more translucent appearance. Oppositely, by decreasing this value, you create a more solid looking particle.
Emissive Lighting and Emissive HDR Dynamic are different from the other lighting parameters. They control emissive lights on the effect, e.g. light that is created by the particle. Usually, these parameters are used if the particle is self-illuminating (like fire, sparks, explosions). Emissive HDR Dynamic works only when HDR is turned on, i.e. Config Spec is set as high or highest.
Now, change the lifespan curve to add a natural transparent look to the fire. Open the additional parameters of the Alpha parameter in the Lighting pane. A particle’s Alpha value controls how transparent it is. Double-click on the green line in Var Particle Life to create a key point (red point) on the line like this.

Double-click at the left top edge of the green line to create a second point and drag this to the bottom of the graph.
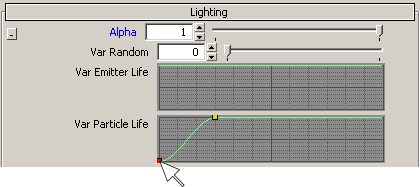
Double-click at the right top edge of the curve to create a third point and drag this to the bottom of the graph.
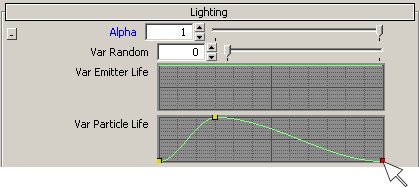
The Var Particle Life curve controls the alpha value of the sprite independent on the texture’s alpha. Longitudinal represents the alpha value, transversal the particle life time.
In this case the particle will appear with 0 alpha value (invisible), then increase to 100% alpha value at 25% of its life time, then fade out and disappear again at the end of its life time.
Note:
You can add or delete more key points by double-clicking them, and move key points by dragging them in both dimensions.
Enter the Size pane and set the parameter Size to 1.3, then open the additional parameters and set the Size Var Random to 0.4.
Adjust the Size Var Particle Life curve to match the graph below.

Next, add a little stretch effect to the sprite. Set Stretch to 0.2, set Stretch Var Particle Life curve as below.
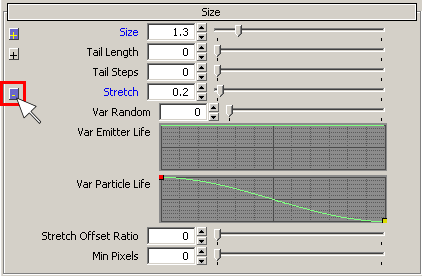
Stretch will stretch your sprite. A default value of 0 means the sprite is not stretched at all, e.g. a perfect square shape. In this case the particle is stretched up to 0.2 at the start of its life and back to perfect square shaped at the end.
Now your particle looks already more like real fire, but with some more tweaking you can get it even closer.
Movement of particles is also very important to add realism to the effect. In this section you will tweak the particle movement parameters.
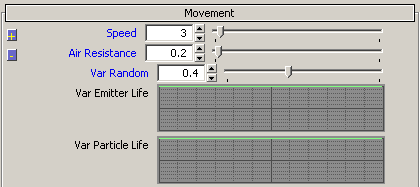
Access the Movement tab and set the Speed to 3 and Var Random to 0.4. You'll find the Var Random as usual hidden behind the little + button. The Speed value controls the speed of the particle. It controls speed along the direction of the Emit Angle, which you will tweak later.

Note:
Remember that adding some random value to parameters is effective to get a more realistic effect in most cases.
Air Resistance is simulating the denseness of air or any medium the particle is situated. In a dense medium like water energy of motion is consumed faster because the water has a higher resistance as air. Oppositely in space particles never loose their velocity.
Set the Air Resistance to 0.2 and the Air Resistance Var Random to 0.4.
Note:
Particles with air resistance are also affected by the environmental forces in the level, like wind, turbulence, or global wind. Thus, if you set high values for air resistance your particles will be affected strongly by wind forces in your level, maybe so much that you won’t see any particles. To avoid this, you can try low values (like 0) to the air resistance first to watch the effect.
Let's go to the Angles pane and tweak a bit more.
Set Emit Angle to 20 and Emit Angle Var Random to 1.

The particle’s default direction is exactly along the Z axis of the emitter. The changes above mean that the particle emits at a 20 degree angle around the Z axis, and get a random direction within -20 to 20 degree. If you don’t set a Random value other than 0 the particles will always get an exact -20 or 20 degree direction from the Z axis, consequently the whole shape of the effect will look like an umbrella upside down.
Set the Random Angles and Random Rotation Rate as below : 
These parameters control the rotation of each sprite. The left column refers to the X axis, center column to Y, and right column to Z.
In this case the particle has a possible 180 degree rotation value on the Z axis when they spawn, and a maximum of 30 degrees random rotation on the Z axis while they are live.
For sprite particles like this fire, the X and Y axis are not affected at all, because sprites are 2D objects – they have no X and Y axis. The particle system also supports imported 3D objects too, which can be used as particles where all 3 axes are supported.
When you get closer to the effect and check the area where the particle is intersecting with the terrain surface you can see a significant edge at the bottom of the sprite.
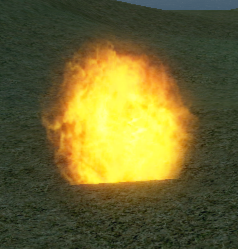
To avoid this edge access the Appearance pane and turn on the Soft Particle switch.
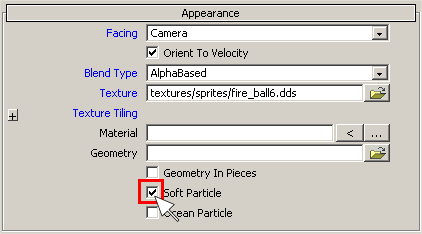
Now the edge has disappeared and the fire looks even more realistic than before.
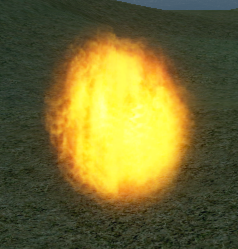
This ends the first tutorial about particles. You now know how to create a simple 2D particle and are able to tweak its basic parameters.
Continue with the second tutorial on particles to learn more about adding further detail.