This tutorial shows you how to build a road and then drive on it with a vehicle. Firstly, we will setup the road geometry and later assign a material.
Have a look at the terrain modification tutorial to get the basic landscape done before you start using the road tool.
The first step you need to do is to get the scale of the road right by placing a reference object. To do this we simply place a vehicle:
Go to the RollupBar click Objects and then Entity and place a vehicle from the Vehicles folder.
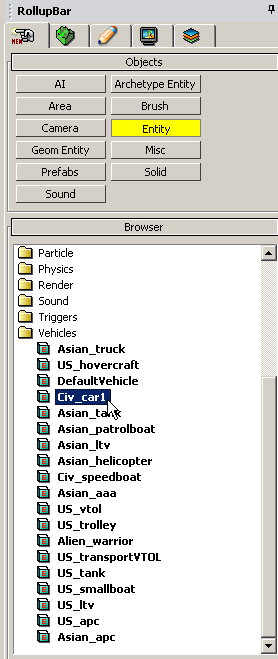
Drag the vehicle on the map where you would like the road to start. The exact position doesn’t matter. You can move the vehicle wherever you want it to be. Now you can see much better how big your mountains and terrain bumps are.
Now we are ready to create a road. Below the entities button is the miscellaneous objects button, which contains the road tool. Click on it to activate it.
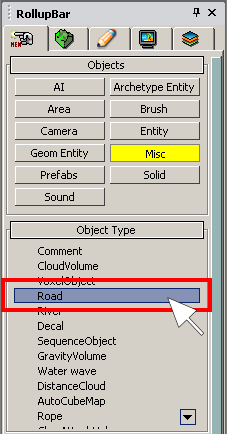
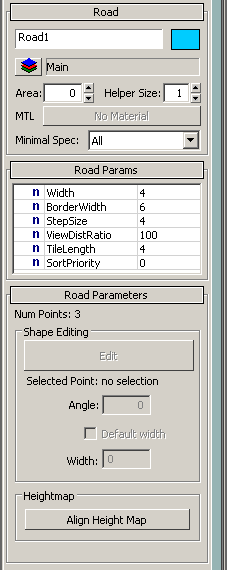
The RollupBar now shows a new set of variables to customize your road.
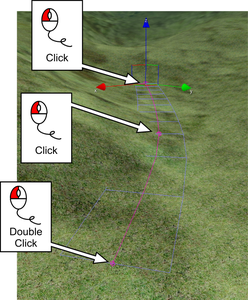
Even if your road looks a little strange and not suitable to drive on, don’t worry too much – you can easily tweak the road later on.
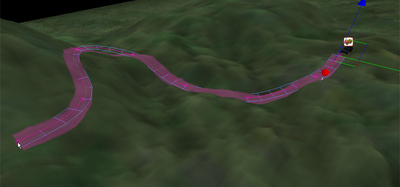
If you look closely at the road you will see that the default texture is always projected on the surface below the geometry that defines the road. Thus the road doesn’t need to perfectly align on top of the terrain. The road segments between the key points try to smooth the road bends to create a more realistic look.
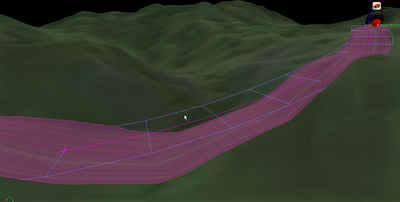
You have a road with a default texture place on the surface, but the surface itself is still far from drivable. To change this click the button “Align Height Map” in the road tool properties:

This will change the terrain and align it exactly to the geometry of the road tool. The terrain next to the road will also be changed applicably.
After you have placed your road, it can easily be modified. Click on the Edit button in the Road Parameters box (if the button should be disabled please de-select the road and select it again).
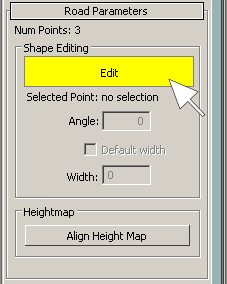
You are now able to control every key point on the road, changing the X, Y or Z position separately, X and Y together or move the key point on top of the terrain. For this choose one of the modes with the X, Y, Z or XY Lock on Axis buttons in the task bar.

Now click on a key point of the road and drag the point to its new position. Choosing the Lock on Z Axis mode enables you to change the height of this key point to manually smooth the road if the particular section is too steep to drive on.
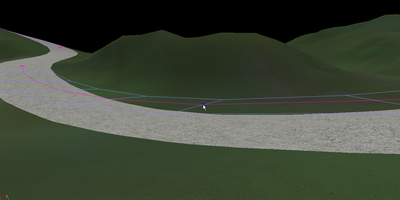
With the Align Height Map button and by modifying the key points, you can place the road exactly where you want it to be.
Up to now the road still has the default texture on it. To change this, open the material editor through the pull down menu.
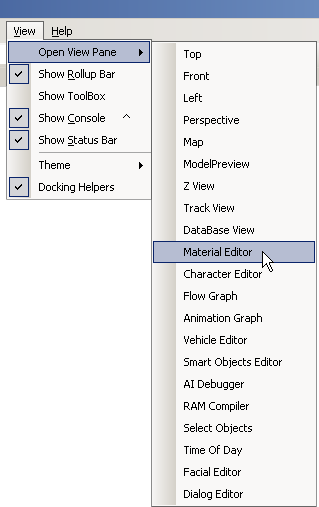
Inside the material editor open the Materials folder and then the Terrain folder followed by the Road folder. Here you will find a list of available road materials.
MATERIALS/TERRAIN/ROADS/*.mtl
Select the road_concrete_driven_on material.
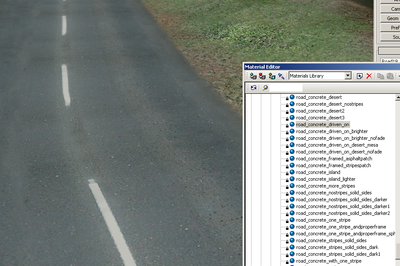
To apply this material to the road entity we just created click the Assign material to Selection button in the material editor.

As you notice you can apply the same material to several road objects at the same time if you select more than one road object.
Note: if you can’t see the texture on the road make sure you have both the check boxes Roads and Decals turned on in the Render Settings (you can find the settings in the RollupBar)
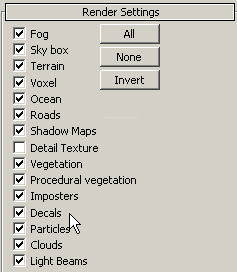
Changing the road parameters will allow you to make it look even better:
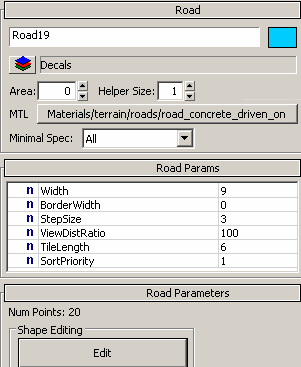
*MTL*:This shows which material is currently assigned to your road. Click on the button to get to the material editor where you can change texture or select another material.
Minimal Spec: Used for setting in which hardware configuration the entity is rendered or not, not recommend to be changed for road tool, as road should be rendered on all specs.
|
BorderWidth |
Only used for the Align Height Map function, this will make a smooth edge on the terrain geometry if the BorderWidth value is higher than the Width value. |
|
StepSize |
A smaller StepSize will increase the polycount used for the road surface, so for roads with smooth corners you want to use a smaller size than the default 4. |
|
ViewDistRadio |
Specifies how far the road entity will be rendered. |
|
TileLength |
The length of the Road Texture. Tweak this in combination with StepSize to avoid stretched textures. |
|
SortPriority |
This setting can be used if you want to have a specific road drawn above another road. |
Press CTRL+G to enter game mode, then enter your vehicle (by pressing the F key next to the door) and press F1 to enter third person view. Now, you will be able to easily see if your road is too wide or narrow for your car.