|
Sandbox 2 Manual
|
   |
   |
Organizing your Scene
|
Sandbox 2 Manual
|
|
|
The Grouping system is another way to control multiple objects as a single thing.
Linking allows you to create parent/child links between your objects, passing down changes through the hierarchy.
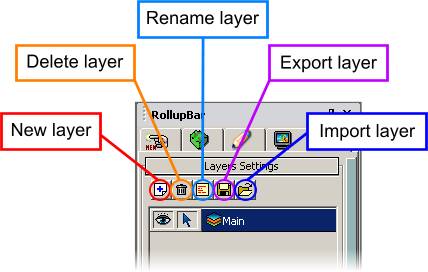
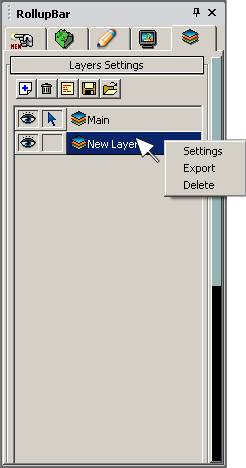
In the Rollup Bar, there is a layer tab, with a few useful buttons, and the layer list. Also, there will always be a “main” layer, by default.
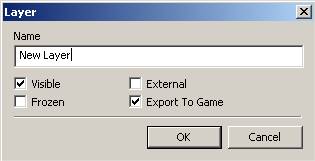
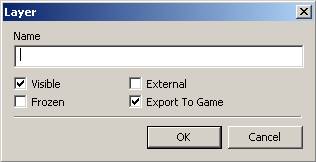
Be sure to enter a useful and recognizable name for your layer, possibly indicating what the function of what it contains, or a description of what it contains. For example “beach area” or “sounds”.
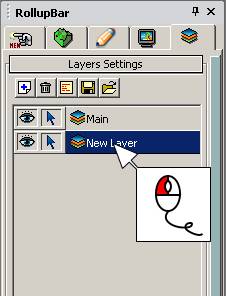

By default any object is placed in the layer “Main”, unless you have another selected from the layers menu.
After assigning layers to your objects and entities, there are a few additional ways to manage them. Go to the layer list in the rollup bar.
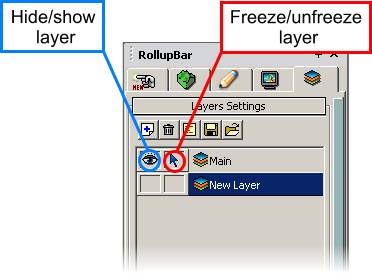
Toggling the eye icon will hide/show the objects in that layer.
Toggling the arrow icon will allow interaction with objects when the icon shows (objects are unfrozen), and disallow interaction when the icon is hidden (objects are frozen).
Double clicking on an icon will make all layers change their state of hide/show or frozen/unfrozen, depending on which icon was selected.
The following dialog box will appear
Grouping objects is very useful for manipulating several objects as one single entity.
To create a group, you must first select the objects you want to be within the group – do this by dragging a selection box round them, or selecting them individually.
One important thing to remember about groups – once an object is within a closed group, it cannot be edited independently, so make sure you set up your objects beforehand.
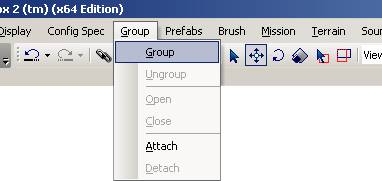
A group can be created by going up to the main menu bar and selecting Group from the Group menu
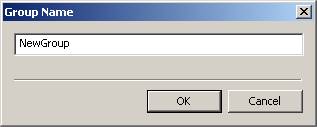
The following dialog will appear
After successful grouping the objects, a wireframe box will appear around your group, with a group specific pivot point.

Linking an object to another will create a parent - child connection between two objects. Changes to the parent object are propagated to any child objects. This link works in one direction only – changing the child will not affect the parent.
This is also useful for linking 2 flowgraph animated objects to each other, to perform actions together.
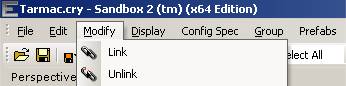
Link and unlink can be found in the modify menu…

…or on the main icon bar. Left icon is link, right is to unlink 
To link two objects, click link, then click and hold your left mouse button down on the child object. Next move the mouse to the intended parent object and release the mouse button.
By clicking unlink on the child object, all links and dependencies are removed.
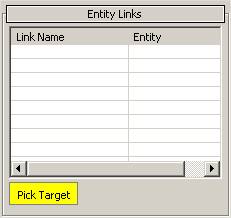
You can create logical links via the entity properties browser in the RollupBar. This is used to logically associate two objects to each other – for example, connecting an area shape to an area trigger.
Select your Entity, scroll down to the area “Entity Links” in the RollupBar and click the button “Pick Target”, than click on the desired target.
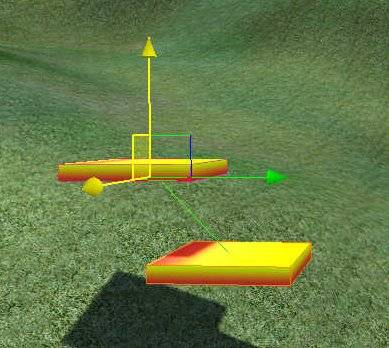
A green line will indicate your link.
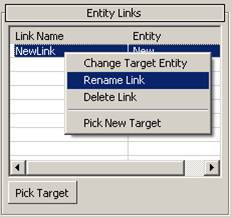
Right click on the link in the objects settings in the RollupBar to edit its properties.
Flow Graph will also allow you to link and unlink objects while the game is running.
The associated nodes are found in the Entity folder in Flow Graph. The two Nodes are “Attach Child” to attach an entity, and “Detach This” to detach an entity.
For more detailed information how to use Flow Graph and linking, please refer to the external Flowgraph documentation.