The Flowgraph can be used to visually script almost everything. In this tutorial we will just focus on making an AI character walk to a point.
Place an AI Grunt Entity (RollupBar/Objects tab/Entity/AI/) in your level.
Place a TagPoint (RollupBar/Objects tab/AI/) in the level. Place it roughly 10 meters away from the AI Grunt as this is the point the AI will walk to.
Place a ProximityTrigger (RollupBar/Objects tab/Entity/Triggers/) in the level.
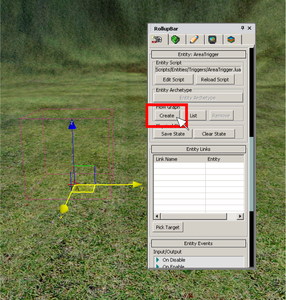
Select your ProximityTrigger, then click on the Create button in the Flow Graph section of the Entity properties.
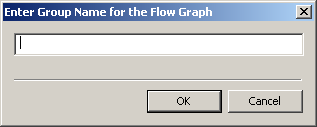
Specify a group in which the Flow Graph will be saved in.
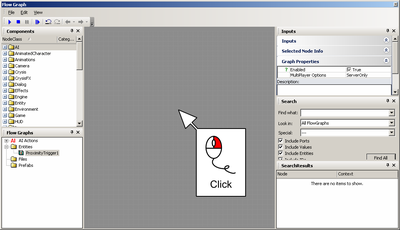
In the Flow Graph window right-click on the field in the middle:
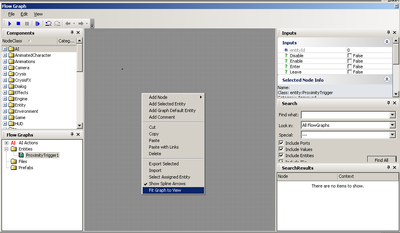
Click Add Selected Entity from the pull down menu.

Make sure the ProximityTrigger Node can be seen, by zooming in with the mouse wheel or by setting Fit Graph to View:
On the left side of the ProximityTrigger Flow Node there are Input events and on the right side Output events. We will be using the Enter Output event on the right of the Node, so that when the player enters the Trigger, it will start the Flow Node and trigger the action.
Now let's add a Node that will make an AI Entity go to a point when the Flow Graph is triggered. Right-click on the grey background of the Flow Graph and select the AIGoto Node (in the AI sub-menu).
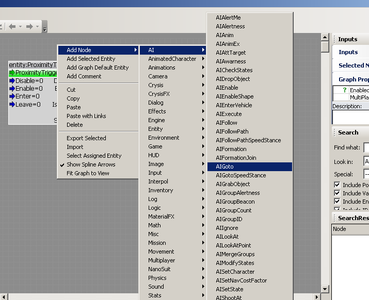
Add also add an EntityPos Node (in the Entity sub-menu):
Keep the mouse button held down while dragging the line from the blue arrow of the Enter out port of the Proximity trigger to the Sync port of the AIGoto Node.
Do the same for the pos out port of the EntityPos Node to the pos port of the AIGoto node.
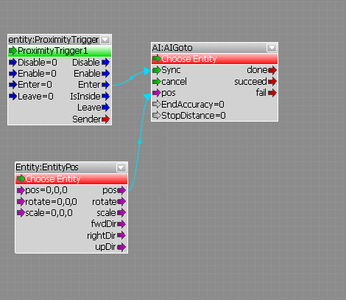
Now we need to tell the system which Entity should be used.
Keep the Flow Graph window open and select the AI Grunt we placed at the beginning in the perspective view.
Now right-click on the AIGoto Node and click Assign Selected Entity.
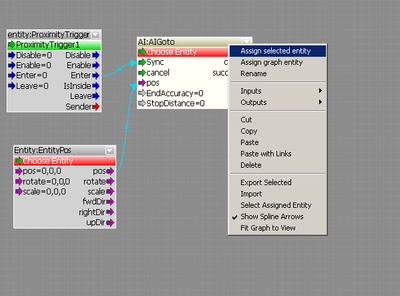
Do the same for the TagPoint we placed at the beginning on the EntityPos Node. The finished Flow Graph should look like this:
As an alternative you can make the AI immediately walk to the point by connecting a Misc/Start Node:
The vehicle will only drive to the point when a driver is inside so make sure you trigger the vehicle to go to the position after the driver has entered the vehicle:
