RollUp Bar Layers
Layer Settings
Layer creation icons
In the Rollup Bar, there is a layer tab, with a few useful buttons, and the layer list. Also, there will always be a “main” layer, by default.
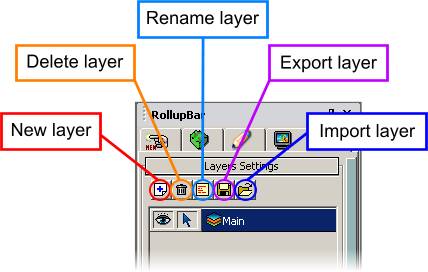
New Layer
This button will create a new layer. After clicking on it, a dialog will appear
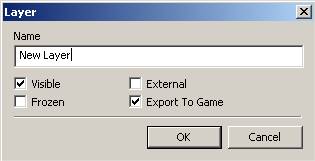
Be sure to enter a useful and recognizable name for your layer, possibly indicating what the function of what it contains, or a description of what it contains. For example “beach area” or “sounds”.
Delete Layer
This button will delete the currently selected layer. A dialog will appear and ask for confirmation. Once a layer is deleted, it cannot be restored without reloading a previous version of the level, or re-importing the layer if it is external.
Rename Layer
This button will open the dialog box which will allow you to rename the currently selected layer.
Export Layer
This button will open a browser window, allowing you to export your layer to a file. Make sure your layer file has the .lyr extension to it. This layer file can be imported into other levels, if required.
Import Layer
This button allows you to import a layer which has been exported previously, Locate your layer using the browser window.
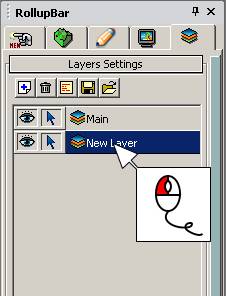
Selecting layers
Left click on the name of a layer to select it
Assigning objects to layers
When you have more than one layer in your level, you can assign a specific layer to your objects. Select an object and look in the rollup bar. You will see the layer icon, shown below. Click it, and it will open the layer selection menu.
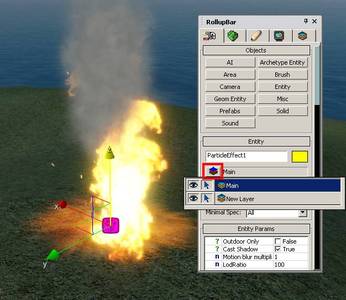
By default any object is placed in the layer “Main”, unless you have another selected from the layers menu.
Hide/show and freeze/unfreeze on layers
After assigning layers to your objects and entities, there are a few additional ways to manage them. Go to the layer list in the rollup bar.
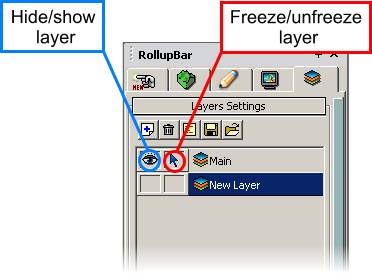
Toggling the eye icon will hide/show the objects in that layer.
Toggling the arrow icon will allow interaction with objects when the icon shows (objects are unfrozen), and disallow interaction when the icon is hidden (objects are frozen).
Double clicking on an icon will make all layers change their state of hide/show or frozen/unfrozen, depending on which icon was selected.
Layer Settings
To enter layer settings, select your layer then right click on the layer name.
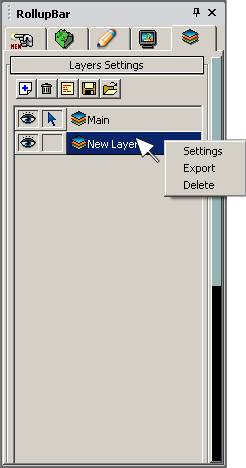
The following dialog box will appear
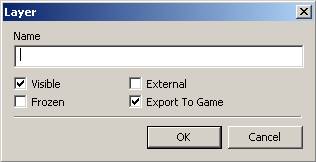
Visible
Does the same thing as the layer hide/show icon.
Frozen
Does the same thing as the layer freeze/unfreeze icon.
External
When this checkbox is enabled, the layer will automatically be exported when your level is saved, and imported on load. The layer will now function externally to the .cry file, and can be edited independently. Unchecking this box will make the layer part of the .cry file again, and the external .lyr file will no longer be updated.
Export to Game
When this checkbox is enabled, the layer will be exported to the game when you use
File/Export to engine . Uncheck this if you don’t wish to see the objects contained in the layer in pure game mode.


