The best results are achieved by manually placing vegetation objects, as it gives you the most control. But by setting up interesting vegetation categories, you can create a good looking base, which will need only minimal reworking. To create nice looking presets, you can tweak the values we discuss in this tutorial.
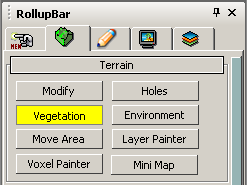
In the RollupBar, select the Terrain/Vegetation tool.
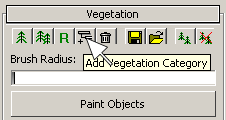
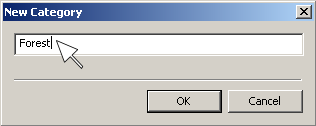
Click the Add Category Button and type in an appropriate name. We will use “Forest” for this tutorial. Confirm the name by clicking the OK Button or by pressing ENTER.
This creates a new category called Forest, which will be available in the objects list.
Click on the name Forest to select it.
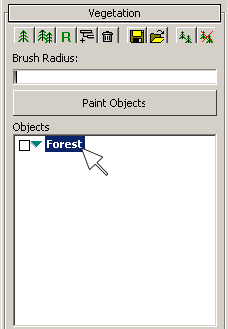
The square to the left of the name toggles the active state of the category. You can use it to activate objects/categories you want to use with the Paint Objects tool. At the moment, no objects were added and therefore it is not active. By clicking on the green triangle you can show and hide the vegetation objects stored inside the category.

A file list will appear. Navigate to the Game/Objects/Natural/trees/palm_tree folder within your local build/game folder (in our case it is located in *J:/Game02/Game*). Select the file plam_tree_large_d.cgf. You will see a preview below the file list. Press the Open button or double-click to select it.
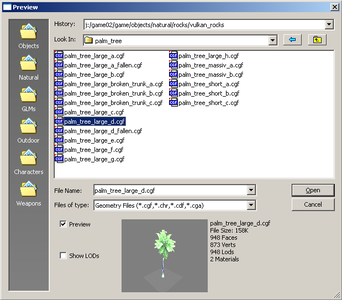
Have a look around the window above. It gives you a lot of information about the object you are about to place into the level. The vegetation object palm_tree_large_d will appear in the list, inside the Forest category.

Placing Vegetation objects:
Select the palm_tree_large_d in the Objects List. The text will be highlighted to indicate the object is selected and can be painted or manually placed
Manually placing single objects:
You can manually place selected objects by using SHIFT + click the mouse button in the perspective viewport. The selected object will be placed on the terrain, based on the position of the mouse cursor. The tree is selected, which is indicated by the green and blue ring around the tree.
Press ALT + click the mouse button and move the mouse to scale a selected vegetation object.
Moving the mouse and pressing right ALT + click rotates the vegetation object.
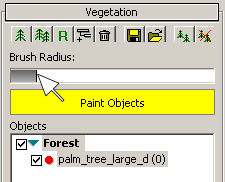
If you move the mouse into the perspective viewport, you will see the brush, indicated by a green circle. Just click and move the mouse around to paint some vegetation. You will see the palm trees being distributed on your landscape.
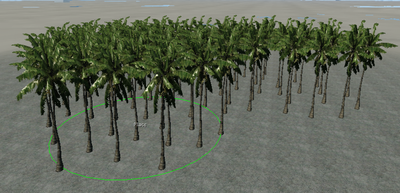
The distribution is very regular however you can adjust the options within the objects bar to give your vegetation brush some variety.
With CTRL + click you can erase vegetation objects. Try it on the trees you just painted.
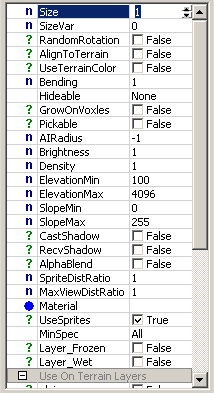
By selecting palm_tree_large_d in the Objects panel, the object options are shown in a list below. Now, lets have a look at the most important options and how they effect the appearance of your brush.

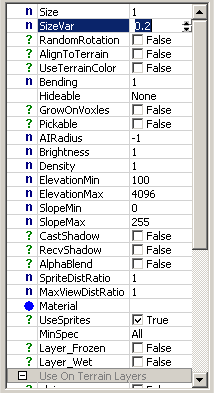
First you need to decide how big your want your palm trees to be in your forest and how much size variation there should be between them. We used the variables Size and SizeVar to do this. Size allows you to scale your vegetation uniformly, whereas 1 represents 100 percent, 1.5 would be 150%. SizeVar is the size variation within a set of painted vegetation objects of one kind. This works on a per brushstroke basis. Keep Size at 1 and set SizeVar to 0.2 to get a nice variation.
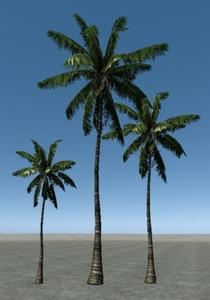
The group on the left has no Size variation, the one on the right 0.2. As you can see, it already looks much better.
To create a more natural look and distribution, you can set up a RandomRotation in the vegetation objects when you paint them. Have a look at the trunks of the palm trees and you will see the difference. This feature only works if you use the Paint Object Tool.
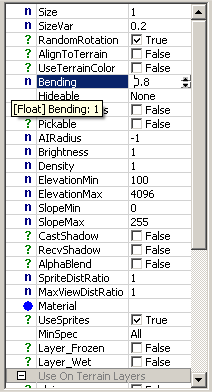
The Bending value controls the procedural bending deformation of the vegetation objects. It ranges from 0 to 1, 0 meaning no bending effect and 1 meaning the maximum effect. Try 0.8 to get a nice bending effect. This value works globally, for all vegetation objects of this type. It is hard to illustrate in a picture, so play with the value and check the movement of the leafs and the bending of the trunk to judge the effect.
You can integrate a whole group of vegetation objects into different lighting conditions by adjusting the Brightness value. Its setting ranges from 0 to 1. 0, and will make the objects appear totally black at 0 and at the brightness initially selected by the artist at 1.
Adjust the value for the palmtrees to 0.8.
To get a better distribution of your trees, you can adjust the Density for a single brush stroke. The density setting ranges from 0 to 100. This value represents the distance between each single vegetation object. Set the value for the Palm_tree_large_d to 10 and paint some trees. You will see the palm trees placed further apart.
In order to get a nicer distribution and more natural look to your vegetation objects when on steep hills and slopes, you can align the objects to terrain.

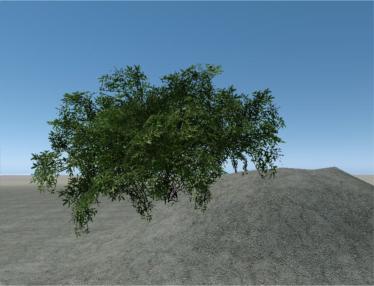
The picture below on the left shows a bush which has not been aligned to the terrain. You will notice a significant gap between the left lower edge of the bush and the terrain. The right picture shows a bush that has been aligned to the terrain. This example looks a lot better and more authentic after terrain alignment.

This option is used to blend your grass with the underlying terrain coloration. You could also use this option on other objects, but it works best with grass. Feel free to experiment with this feature.

The left picture shows a grass object with UseTerrainColor turned off and the right one with it turned on.
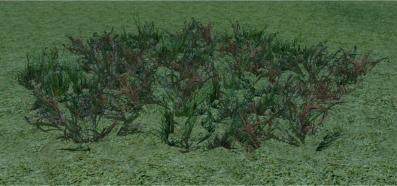
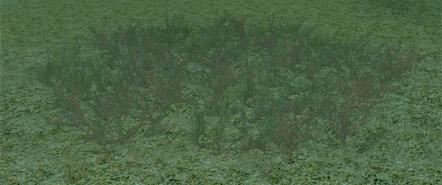
This effect is especially valuable for disguising grass fading in the distance.
To conclude this tutorial we will add the bush object from the AlignToTerrain section and the grass object from the UseTerrainColor to the vegetation category. Setup your vegetation as shown in the images below.
Add two vegetation objects like you did for the palm tree.
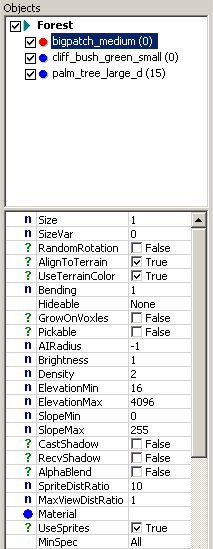
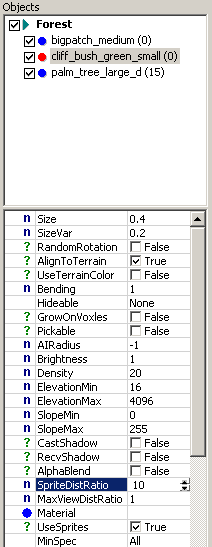
Select your Forest Vegetation Category, adjust the Brush Radius, activate Paint Objects and start painting.


You should see a result that looks something like this
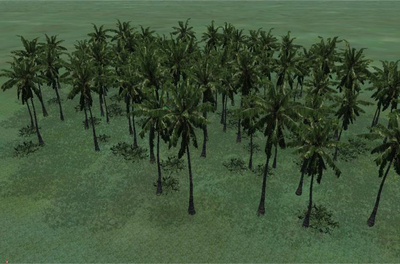
Now move the camera into the jungle, slightly over the ground to get a real feeling of the jungle you have created.
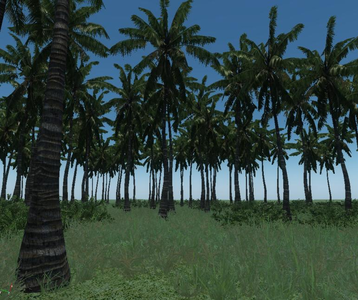
Feel free to play around with the options and create your own personal jungle. You don’t need to add many more vegetation objects to create a lot of variation. Use the same bush again and adjust its brightness, size and density to give some variation to the bushes. Do the same for the palm trees to get some color variation. For fine tuning, you can always place or erase single vegetation objects. Use the same brush to paint an area without trees, just by selecting the bush and grass object. The variations are almost endless. Most importantly have fun!
Note
For painting underwater vegetation, make sure to adjust the ElevationMin Value. Set it lower than the ocean, failsafe would be 0.