This tutorial will show you how to set up custom objective text for your level. In this tutorial, we will assume basic knowledge of flowgraph and object placement.
This technique will only work after applying Crysis patch 2!
When you open up the file in a text editor, you will see lots of text. Don’t worry! we’ll break it up into useful chunks.
The example objectives.xml file used in this tutorial can be downloaded from  here by right clicking and selecting "save as".
 <Root>
   <Levelname>
    <Objective_01 Name="Mission Objective Title" Description="Mission Objective Description" />
   </Levelname>
 </Root>
At the start and end of the objectives file, you need to place <Root> and </Root> tags.
Next, you need to create a tag for your level. If your level is called “Levelname”, the tags will be <Levelname> and </Levelname> .
<Root>
  <Levelname>
    <Objective_01 Name="Mission Objective Title" Description="Mission Objective Description" />
  </Levelname>
</Root>
Now, we will set up the objective and its text.
Within the level tags, you’ll place another tag, containing a short reference number for the objective. For example, if it is the first objective in your level, open the tag with <Objective_01 .
Please note, if you want multiple objectives in your level, just clone this entire line, with a second objective line, as shown below:
<Root>
  <Levelname>
     <Objective_01 Name="Mission Objective Title" Description="Mission Objective Description" />
     <Objective_02 Name="Mission Objective Title" Description="Mission Objective Description" />
  </Levelname>
</Root>
<Root>
  <Levelname>
    <Objective_01 Name="Mission Objective Title" Description="Mission Objective Description" />
  </Levelname>
</Root>
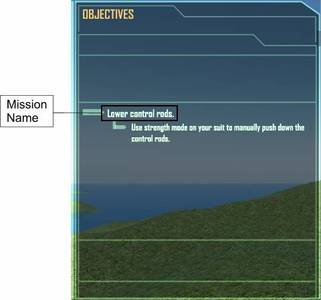
Next, we need to add Name for your objective. After your <Objective_01 , add Name="Mission Objective Title" , where Mission Objective Title is the name of your objective – “Lower Control Rods”, in the below example.

You may notice that objectives have @ at the start in the existing Objectives.xml. Do not include these in your objectives, as they are only used for text localization.
<Root>
  <Levelname>
    <Objective_01 Name="Mission Objective Title" Description="Mission Objective Description" />
  </Levelname>
</Root>
Now we need to create the description of the objective. The description is the longer text under the name of the objective. Replace Mission Objective Description with the required text. To finish off, close the tag with />

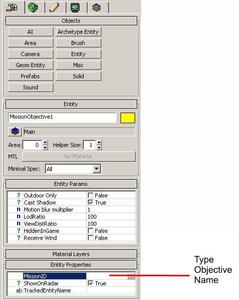
Now, go into Entity Properties and type in the name of your objective in the following format, to the box shown in the image below.
Levelname.Objective_Number
For example, if I needed to use Objective_03 in my level called Test, I would type this.
Test.Objective_03

/////Bugged. The above is to replace the fact the below doesnt work. For Michael Smith.
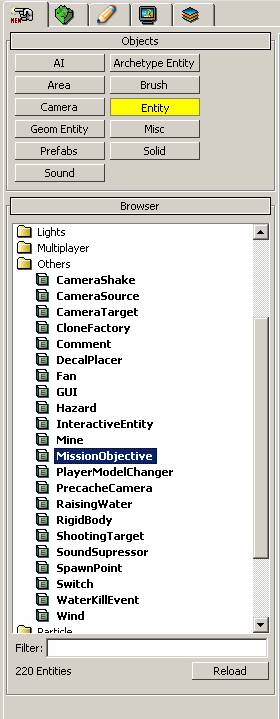
More details on setting up a mission objective can be found here.
You should give a summary of what you want to achieve overall in your level.
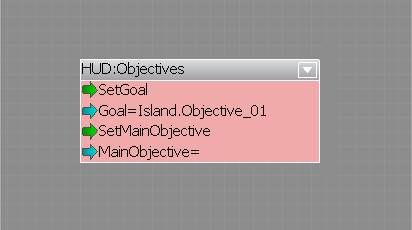
Place a Hud/Objectives node into your level, set its properties to the objective you want, and trigger the SetGoal input port.
