To start off doing minimaps you will have to edit the MapScreenshotSettings.xml with Notepad , the xml file is located in the \Editor folder.
A lot of these settings can be tweaked to create the most desirable result, also make sure to create a backup copy of the original MapscreenshotSettings.xml .
<<b></b>settings>
<<b></b>e_fog value="1" />
<e_shadows value="0" />
<<b></b>r_PostProcessEffects value="0" />
<<b></b>r_HDRRendering value="0" />
<<b></b>e_detail_materials value="1" />
<<b></b>e_gsm_range_step value="20" />
<<b></b>e_gsm_lod_num value="3" />
<<b></b>e_gsm_range value="20" />
<<b></b>e_gsm_cache value="0" />
<<b></b>e_detail_materials_view_dist_z value="256" />
<<b></b>e_vegetation_sprites_distance_ratio value="4" />
<<b></b>e_shadows_cast_view_dist_ratio value="1" />
<<b></b>r_EyeAdaptationFactor value="0" />
<<b></b>r_EyeAdaptationBase value="1" />
<<b></b>r_HDRRendering value="1" />
<<b></b>e_lod_ratio value="4" />
<<b></b>e_clouds value="0" />
<<b></b>e_water_ocean value="1" />
<<b></b>e_particles value="0" />
<<b></b>e_view_dist_ratio value="800" />
<<b></b>e_hw_occlusion_culling_water value="0" />
<<b></b>/settings>
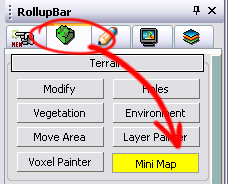
Now when pressing the minimap button, a green bounding box, and a smaller blue “selection” box will appear on the terrain, this is sometimes at the 0,0,0 map coordinates.
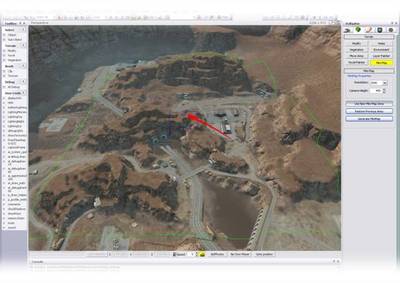
To move the minimap bounding box, click and hold the right mouse button and move the blue “selection” box to the spot where you want to create your minimap.
The green bounding box shows the area that will be made into a minimap image, adjusting the camera height will therefore change the size of it.
To change the Camera Height , put the preferred height into the input box and press “ Use New Mini Map Area ”.
Adjusting the Resolution in the minimap properties will increase the size of the minimap image that the Editor generates, for example choosing a resolution of 2048 will give you a minimap image of 2048x2048 pixels.
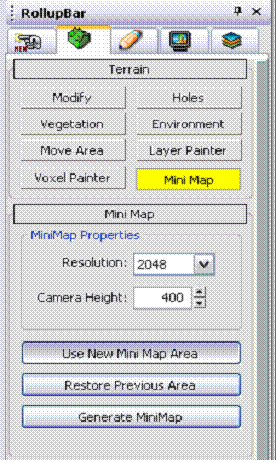
This is an important step and rule to keep in mind when creating minimaps, to prevent having to redo your minimap.
You can now go ahead and press the Generate MiniMap button.
A quick succession of images will flash in the upper left corner, showing that the editor is creating your minimap; this can take a few minutes depending on the Camera Height , Resolution and MapScreenshotSettings.xml .
(Note though that you should only choose to use very large resolutions i.e. 8192 or 16384, if you are running the editor on a very high spec system with a minimum of 8 GB of ram)
After the editor has finished, your minimap should be placed in \Game\ScreenShots\Map along with the .XML file
The xml provides the engine with the map coordinates so that the player position is correctly displayed on the minimap.
To make sure that your minimap will display correctly in the game you will need to desaturate your image and tweak its “levels”.
Try to avoid creating completely black areas.
To start off, go to Image>Adjustments>Levels, this will open up the “levels” output box.
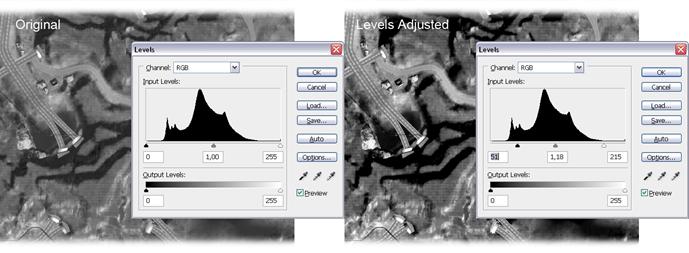
By adjusting the input levels you can create a well contrasted image.
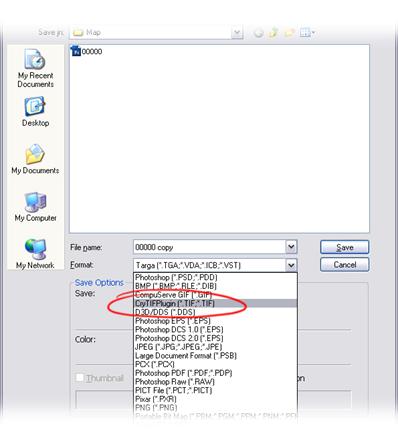
Go ahead and press save now as this will start the crytifplugin , which has a wide range of settings and options – but we only need to use a few.
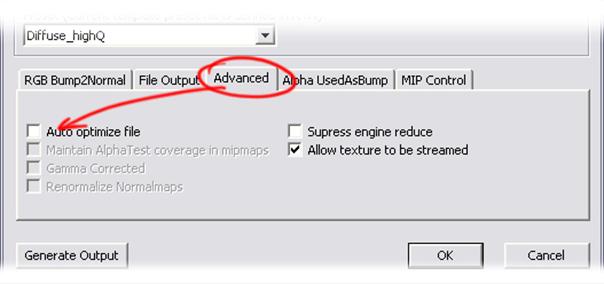
You can now go ahead and press OK , crytifplugin will now go ahead and create a .TIF file – don’t worry about the end file size. The Resource Compiler will automatically create a .dds file for the target platform, specified in its settings.
IMPORTANT you do not need the Cry Tif plugin for Photoshop to create a minimap.
Just use the .dds plugin from Nvidia to export the minimaps as DXT1 from Photoshop.
If you already have an xml file located in your map folder, you can merely open it with notepad .
Inside the xml file you will need to edit the numbers in the first line that shows the startX , startY , endX and endY , exchange the numbers here with the numbers located in your minimap xml file.

Make sure that the MiniMap Filename points to the filename of your new minimap .dds image file.
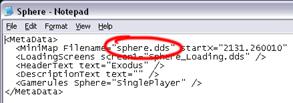
Instead of putting in .TIF as the file definition you will need to put in .dds instead (the one the Resource Compiler will create from the TIF, or you manually created via the NVIDIA plugin).
(Note if there is no numbers located in the xml file, just copy the whole line from your minimap xml file.)
The minimap is now visible in your map.
This process will require you to create several smaller pieces of your minimap and then later putting them together using Photoshop.
This is mostly a process you will have to do if your pc is not able to handle the creation of high resolution minimaps.
Before starting, make sure that you’ve got the NVIDIA Texture Tools installed in Photoshop. ( http://developer.nvidia.com/object/dds_utilities_legacy.html)
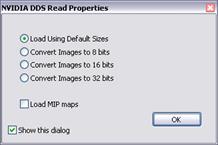
With the minimap opened you can see here on this example below that the quality at 100% is not the best. We’ll change that.
For higher quality it’s enough to change Camera Height and keep the resolution to the original minimap, this is important otherwise you will run into issues with image sizes not matching.
You will also need to change the lines listed here below, in the MapScreenshotSettings.xml , these settings will raise the quality and amount of objects visible. After you’ve edited the MapScreenshotSettings.xml you can go ahead and press Generate MiniMap , this will again create a minimap image file and an xml file, the xml file you can safely delete as there’s no need for it.
Select the whole image by going to Select>All and select copy under Edit>Copy.
Go to your minimap that you want to add detail to, under Edit>Paste and place in the copied image.
This is where the calculator will come in handy for you, i.e. if your minimap was created with a Camera Height of 512 for example; you preferably generate the smaller minimaps in increments such as 256 or 128 etc.
If you for example generate smaller minimaps with 128, that’ll need to be divided by 512 to calculate the scaling percentage (128/512 = 0.25, which equals to 25% scaling.) 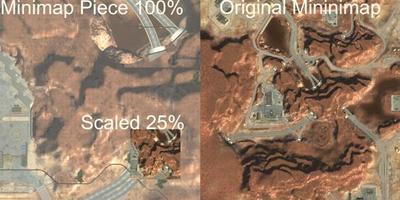
Repeat steps 2 to 5 as many times as you want to ensure that your minimap has a high level of quality.
And that’s it; with a little bit of extra work you will have a very high quality minimap.