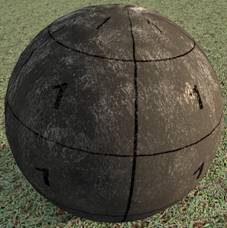
This tutorial will show you how to use the material editor in CryENGINE®2 with all its features.
You can open the material editor in two different ways. Either use the editor menu or just press the M key.

To open it via the editor menu, you have to select VIEW in the menu then select the subfolder Open View Pane. There you find the material editor button.
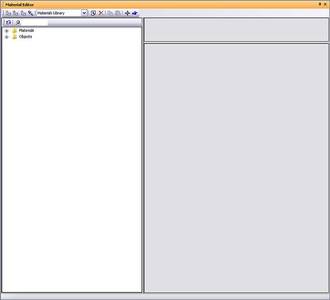
On top of the window is the toolbar . Under the toolbar you find two further windows. The material browser on the left and the material settings on the right side.
You find the toolbar on top of the material window.


Now you have to save the material into your desired folder.
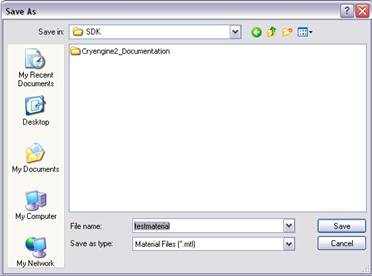
You can see that the material you have created was added to the material browser.
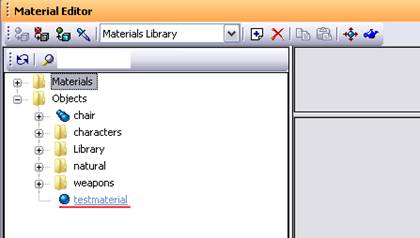
You can also add a material by right clicking into the empty material editor space. A[add new material] option box appears where you can press the [add new material] button.
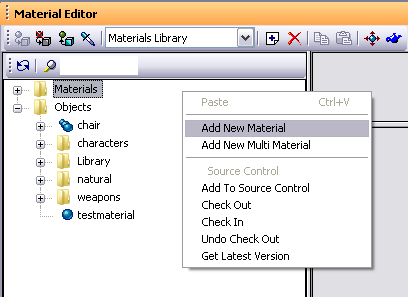
T[remove item] delete a material select it and click on the [remove item] button.

To[add new multi material]create a multi material right click into the empty material editor space and press the [add new multi material] button.
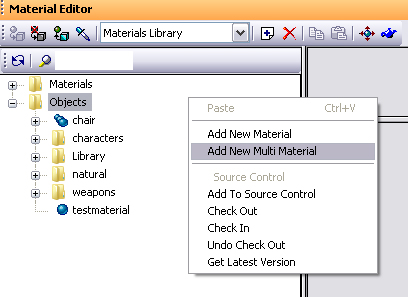
You now have to set the number of sub materials / material IDs you want to have.
R[set number of sub materials]ght click the material you created and select [set number of sub materials]
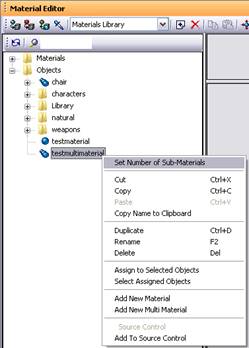
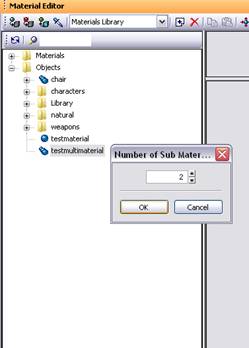
You can set the numbers of material IDs by pressing the arrows or typing in the desired number.
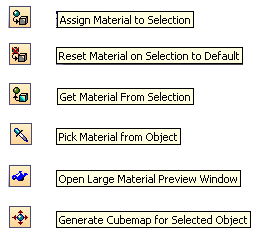
Assign material to selection: Assign material to the object that is selected in the editor.
Reset Material on selection to default: This resets the material on the selected object. It just works if you assigned another material than the default one before.
Get material from selection: This will show the material which is assigned to the selected object.
Pick material from object: You can get the material of an object in the scene by using the picking tool. Therefore you have to click with the picker on the object you want to get the material from.
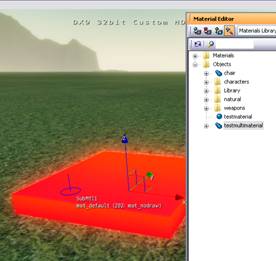
Open large material preview: To get a larger preview of your material you can press the [open large material preview][open large material preview] button.

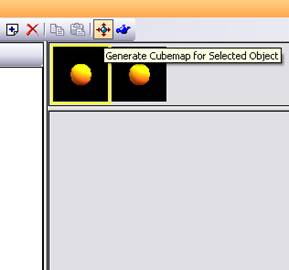
Generate cubemap for selected object: This function will create a cubemap for the selected object in this specific environment. The cubemap will show the environment surrounding the selected object.
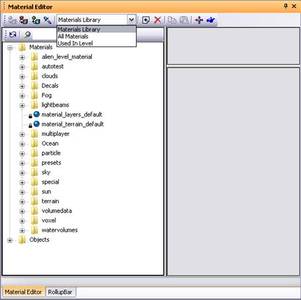
In the material browser, which you can find at the left side of the material editor, you can browse all your material. In the option box above you can select which materials you want to see in the browser.
All materials for example shows all materials that are in your working folder, no matter if they are checked in or not.
Used in level shows just the materials which are used in your level.
In the material browser right click menu you can find most of the functions that can be found in the toolbar, and some perforce commands.
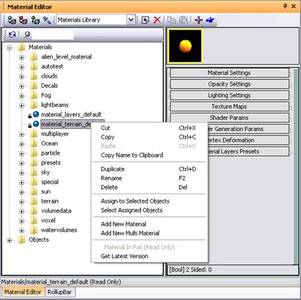
The functions you can find there, beside the perforce commands, are all basic commands like copy/paste/delete. They will only influence the selected material.
You can find the material settings of a selected material on the right side of the material editor next to the material browser. On top of the material settings window you can see a preview window for each material ID / sub material. You can open the setting menus by clicking on them.
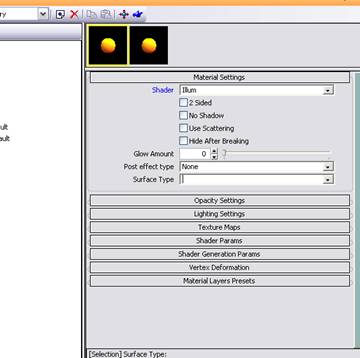
Shader: Here you can select the shader you want to use. Generally you use Ilum/ metal/ vegetation/ glass shader.
2 sided: Both sides of the face the material is assigned to will be rendered by the engine. You normally use this for objects with alpha channels like leaves witch have no thickness.
No shadow: Faces the material is assigned to will not cast a shadow.
Hide after braking: This will make a subset disappear when the object it’s attached to breaks procedurally. An example is a liana that disappears when the palm tree it hangs from breaks.
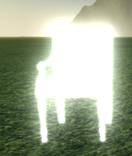
Glow amount: Sets the glow amount of the material ID. Here an object with a glow amount of 50:
Post effect type: Here you can select a post effect type you formally created. Generally you assign post effect by hypergraph. So you won’t use this function in the material editor very often.
Surface type: You can select a surface type for your material here. The surface type sets up what kind of sound will be played or what kind of particle effects will be spawned when you shoot the object. For an old wooden table you would choose “mat_wood_dusty” or just “mat_wood”.
Mat_wood:
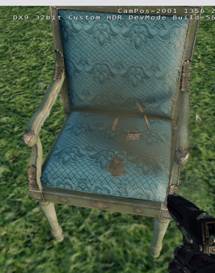
Mat_metal:
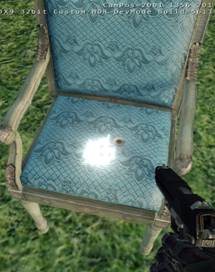
These settings are important if you use alpha channels for transparency, like leaves and wire fences, for example.
Opacity: With the opacity value you can switch between alpha blend and alpha test.
<EMIT </img>
Opacity value: 0-99 -> alpha blend Opacity value : 100 -> alpha test
With alpha blend you can get very soft and semi transparent results, but it is more expensive than alpha test. Here with an opacity value of 50:
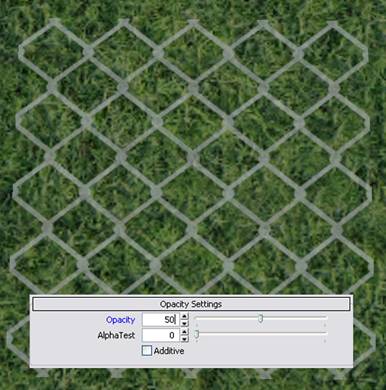
If you want to use the less expansive alpha test you have to set the opacity value to 100 and the Alpha test value to 50. 50 is the default value. If you choose a value below 50 it will tend more to the white color of your alpha map. If you choose a value above 50 it will tend more to the black color of your alpha map.
Alpha test = 50 - default
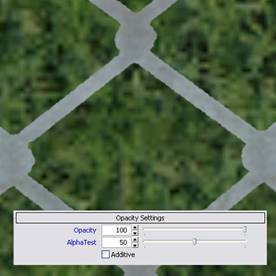
Alpha test = 10
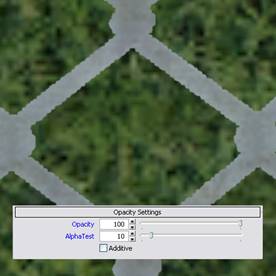
Alpha test = 90
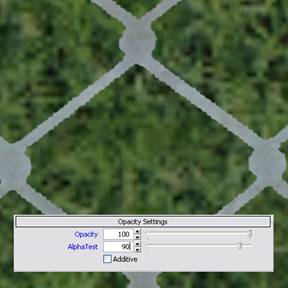
Additive: If you use a semi transparent material like glass you can use the additive function. The material color will be added to the background color. The resulting color will be brighter then.
In this section you set up your material color and specular settings.
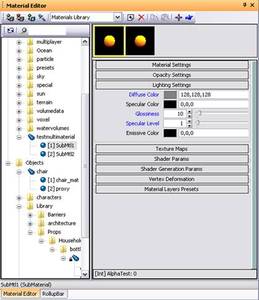
Diffuse color: Here you can set up your material diffuse color by double clicking the color square. The default RGB value is 128.128.128.
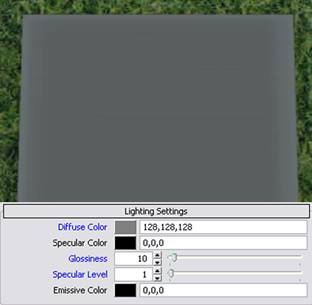
You choose the color on the left side by clicking your desired color. With the slider next to it you set up the brightness. You can also type in the RGB code in the fields below. Sat. saturation / Lum. luminance

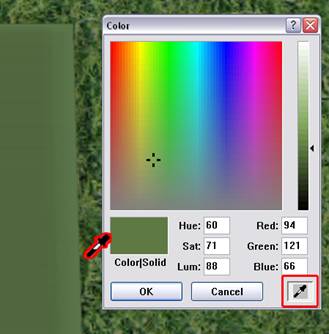
You can also use the color picker to choose your color. Therefore you have to open the color window. In the bottom right corner you find the color picker icon. Click it and chose a color in your scene.
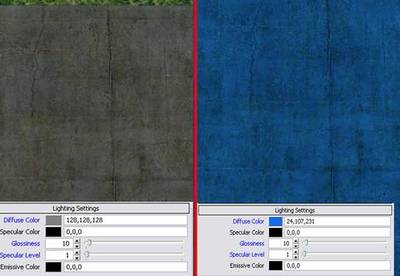
If you are using a texture map for your material you can colorize it by changing the diffuse color, in this case with a blue color.
Specular color: The specular color is the reflecting or shining color of your material when light shines onto the object. It is some kind of simplified reflection effect. You choose the specular color the same way you choose your diffuse color. The brighter your specular color is the shinier your material will look like.
Here an example with a black (left), a grey (middle) and a white (right) specular color.
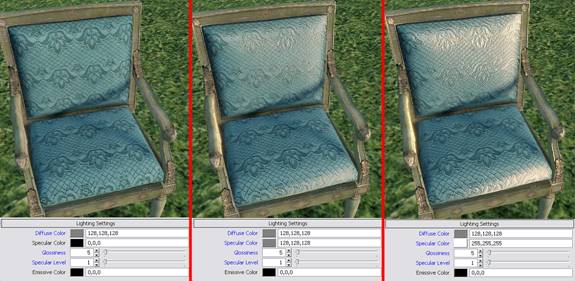
You can also colorize the reflected color by choosing a color in the color window.
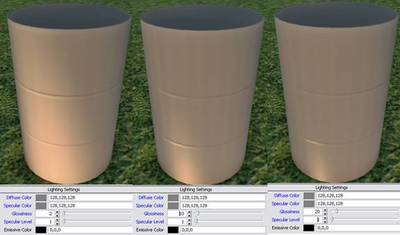
With glossiness you define if you want to have a sharp or a scattered specular reflection. The default value is 10. With a value <10 you will get a scattered specular reflection. With values > 10 you will get a sharp specular reflection.
Glossiness 2 (left) / Glossiness 10 (middle) / Glossiness = 20 (right)
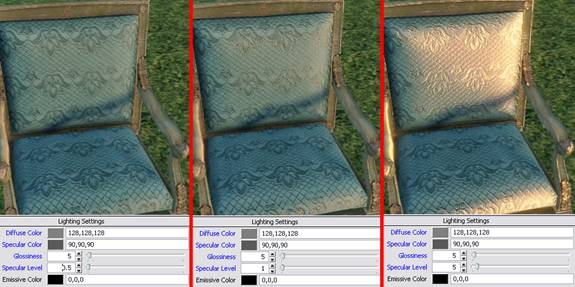
Specular level: Specular level works like some kind of specular multiplier. The default value is 1. A value smaller than 1 would result a less strong specular reflection. A value higher than 1 would result a much stronger specular reflection.
Spec.level 0.5 (left) / Spec.level 1 (middle) / Spec.level = 5 (right)
Emissive color: The emissive color makes the material emit light. If this is used in a dark scene the material would glow in the dark (black emissive color on the left and a red color on the right side of the screenshot in the example below).
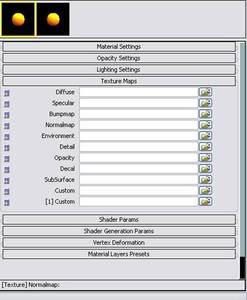
In the material editor you have got different slots for your texture maps to control the shader effects, depending what kind of shader you are using.
To add a texture to the material slot you have to click the folder icon on the right side or copy paste the texture path into the empty slot.
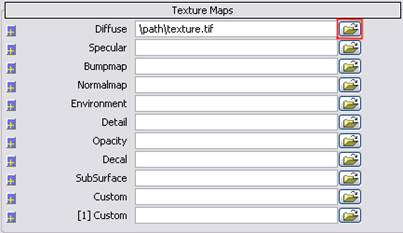
All texture map slots have got sub menus where you control the rotation, the offset and the tiling of the texture. They work the same in all map slots.
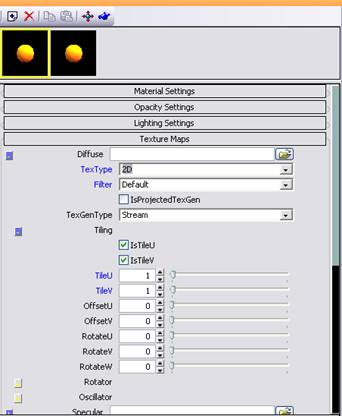
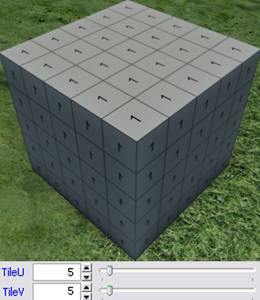
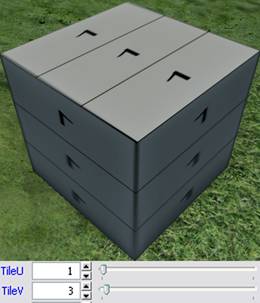
Tiling: You can tile your texture for U and V axis separately by using die arrow button, the slider or the text field.
Here a texture with a tiling of 1,1 a tiling of 5,5
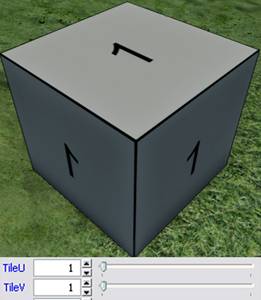
and finally a tiling of 1,3
Offset: You can move the texture on the model in U and V direction separately. In the example below the texture is moved 1.32 in U and 2.17 in V direction.

Rotate: You can rotate the texture on a model in U and V direction separately. In the example below the texture is rotated about 45 degree into U and V direction.
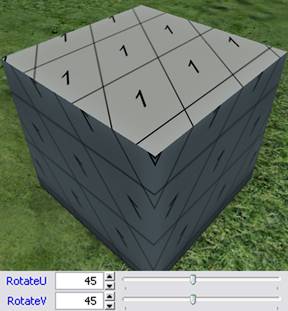
Rotator: With the rotator you are able to create a rotating/shifting texture animation. You can choose between three different types of rotation by clicking the option box.

No change: If you choose this type the rotator is deactivated.
Fixed rotation : Fixed rotation is a static rotation, no animation. It is similar to the rotation function of the tiling menu.
Constant rotation: The rotation will be constant rotating/shifting in one direction and back.
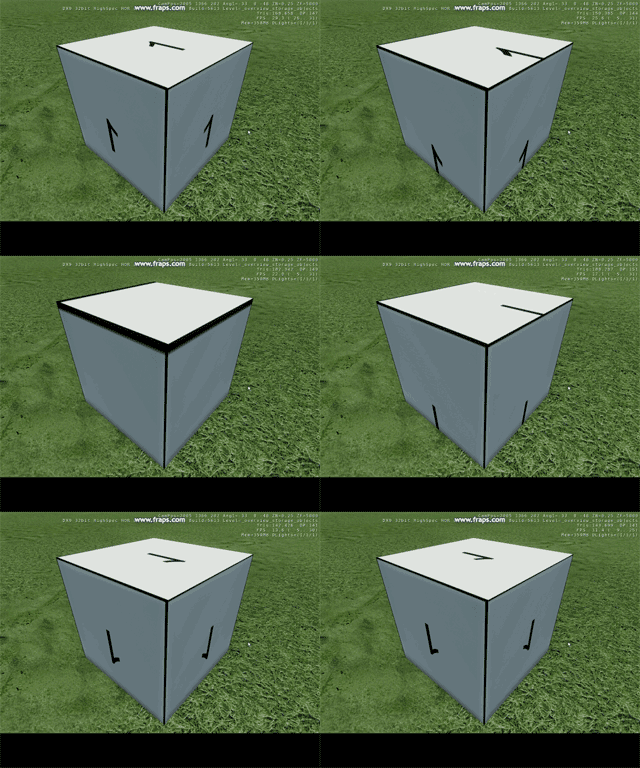
Oscillated rotation: The rotation will be oscillating from the minimum to the maximum and back.
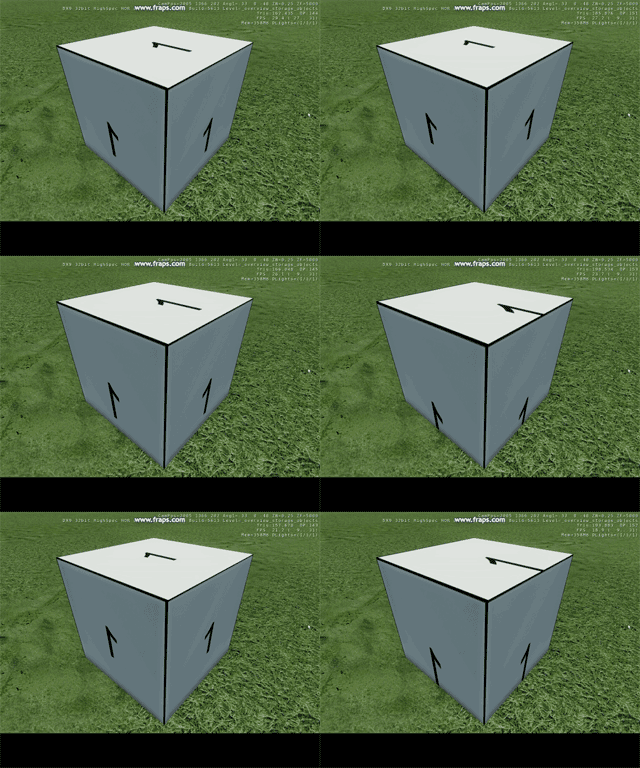
If you have chosen your rotation type you can control its behavior by adjusting rate / phase / amplitude separately for U/V.
Rate: Rate or frequency defines the number of complete rotation cycles per unit of time. Or in case of oscillating rotation it defines the rate of change of direction.
Phase: The phase of an oscillation or wave is the fraction of a complete cycle corresponding to an offset in the displacement from a specified reference point at time t = 0.
Amplitude: The amplitude defines the maximum value of your oscillation/wave.
Oscillator: Like the rotator, you can animate your texture. You can choose between different types of oscillation.
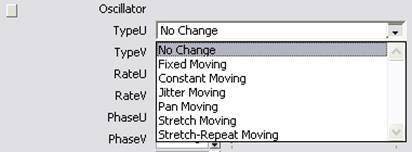
Fixed moving : Fixed moving is a static oscillation, no animation.
Constant moving: The texture will be shifted endlessly in the adjusted direction.
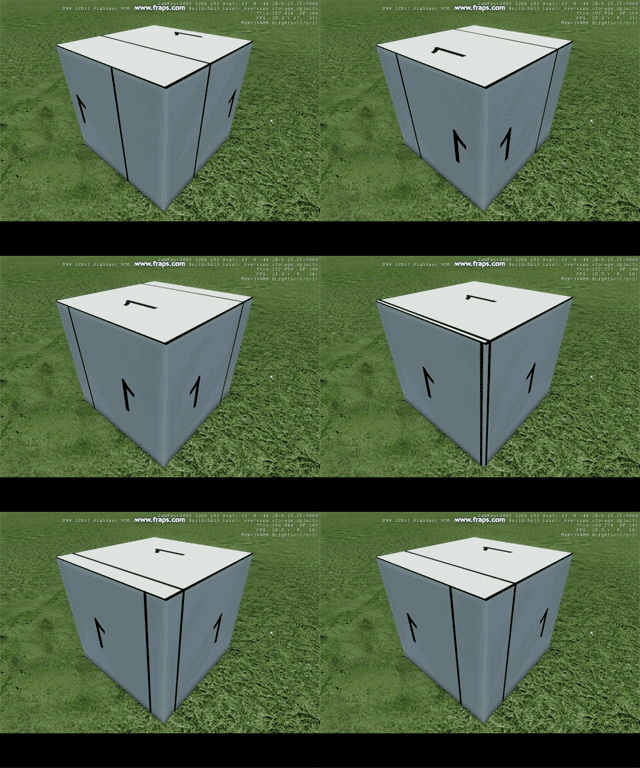
Jitter moving: The texture will be shifted endlessly in the adjusted direction with jittering added. It will have some kind of stroboscope effect.
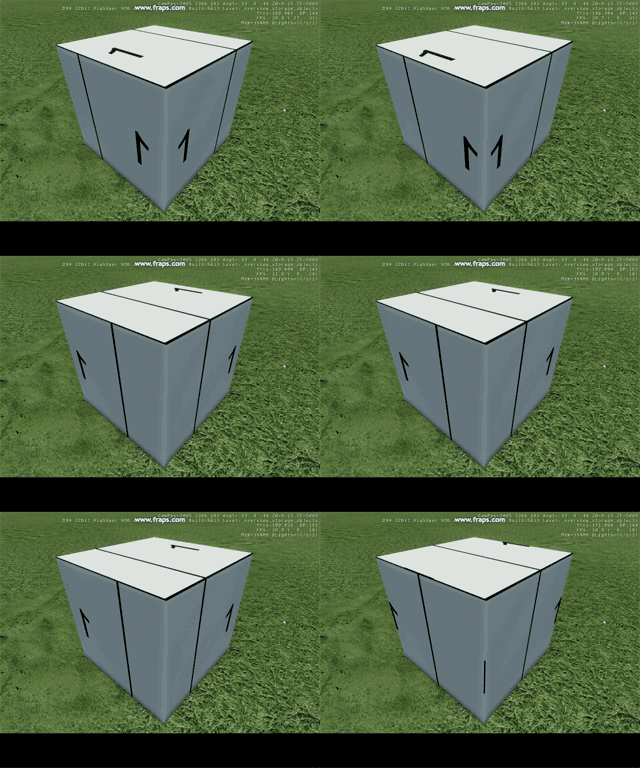
Pen moving: The texture will be shifted in the adjusted direction until the maximum amplidude is reached and back until the minimum amplidute is reached. It is comparable to a pendulum movement.

Stretch moving: It is comparable to pen moving with the difference that the texture will be stretched and not shifted to the adjusted direction until the maximum amplitude is reached and back until the minimum amplitude is reached.
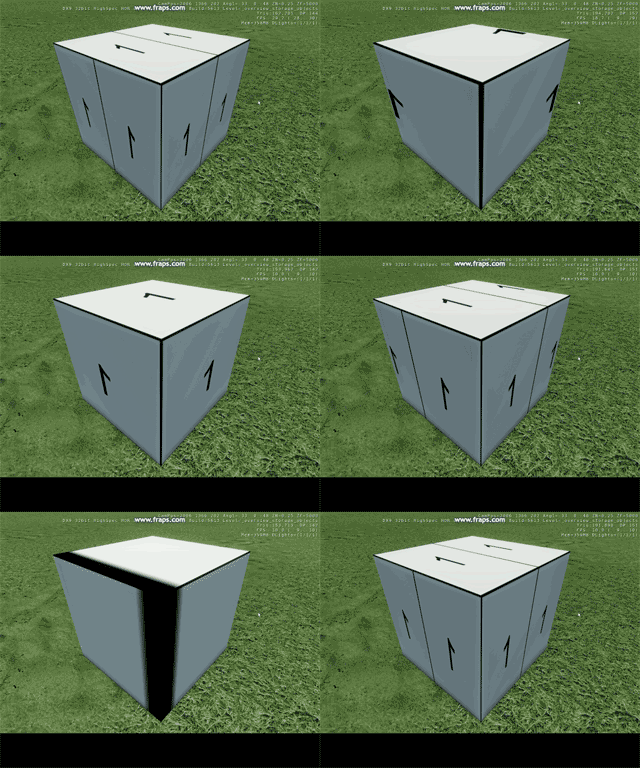
Stretch-Repeat moving: It is comparable to stretch moving with the difference that the texture stretching restarts at 0 when the maximum amplitude is reached.
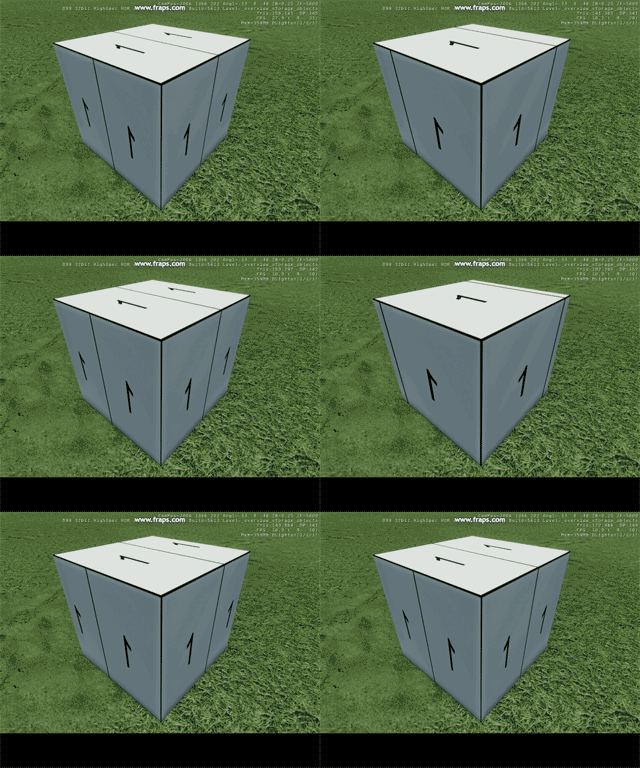
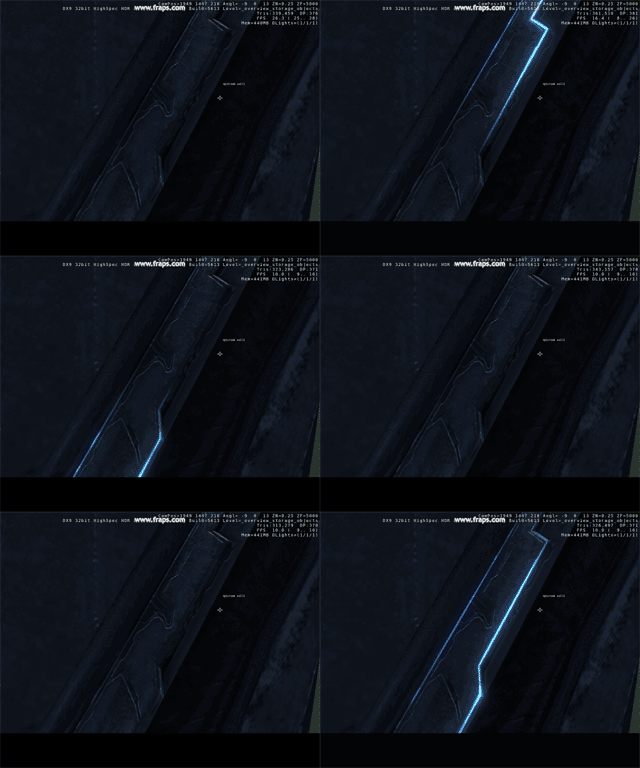
The rotator and oscillator functions are only available for diffuse and decal textures because of technical limitations! You can create a lot of cool effects like animated glow by using the decal slot. It will be explained a bit later.
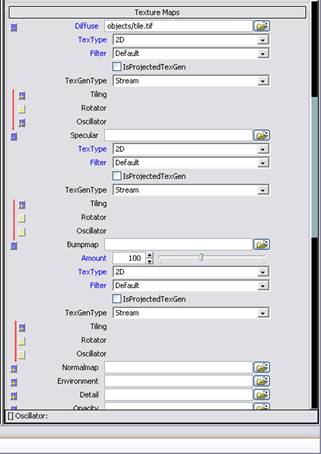
Specular maps represent the specular intensity and color of material highlights. It defines the "shinyness" and color of specular reflections. The brighter the specular map is the, more shiny is the resulting material.
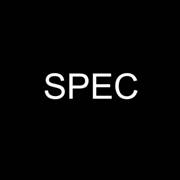
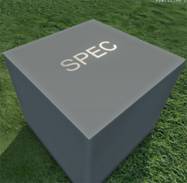
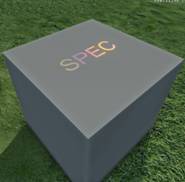
You can use both, black/white and colored specular maps.
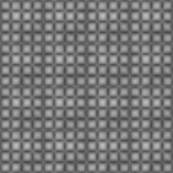
Bump mapping adds an illusion of depth to your material. There for you need a grayscale texture map. The darker the bump map the more distinctive is the illusion of depth.
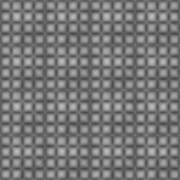
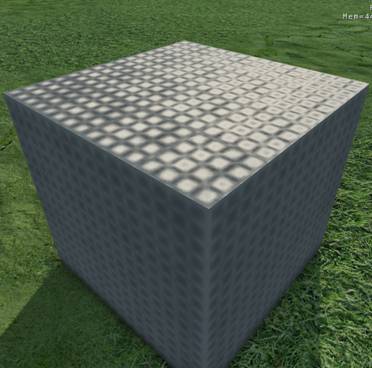
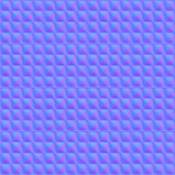
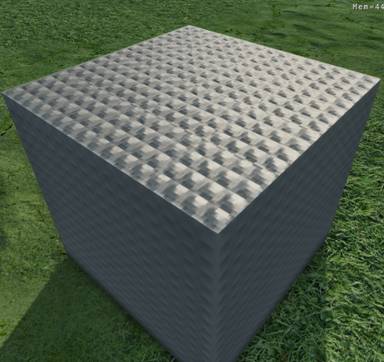
Normal maps define the direction of normals on a surface. The normal direction for each pixel of your texture is stored in the RGB color normal map. You can create a normal map in two different ways. You can convert a bump map into a normal map or calculate the normal map out of a highpoly mesh.
grayscale bump map: converted normalmap with Nvidia Photoshop plugin:
To make a material reflective we need an environment map or cubemap.

To activate the environment map you have to set the flag in the “shader generation params”.
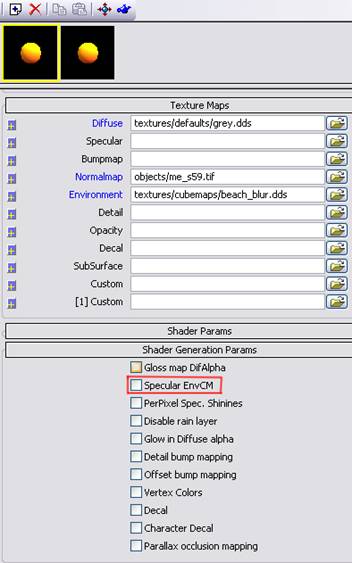
For the ilum shader the flag is called “Specular EnvCM ”.
For the metal shader it says “environment map”.
If you set the flag and added a cubemap to the “environment map” slot You can adjust the environment map by using the “shader params”.
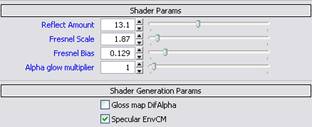
Reflection Amount: The reflection amount defines the intensity of your reflection.
Fresnel scale and Fresnel bias: Both parameters affect the reflection. It is simulating a realistic reflection depending on the view angel of the camera. The flatter the angle the more intense the reflection is.
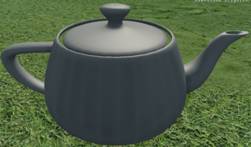
Teapot rendered in CryENGINE®2 without environment map.
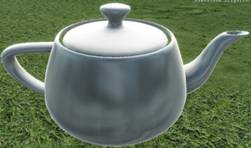
Teapot rendered with environment map
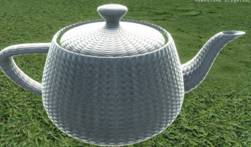
Teapot rendered with environment map, combined with a normal map.
Detail mapping allows us to add more detail to surfaces. It works like a second material layer and it is not affected by the mapping of the model it is used for.

We can use any tileable RGB texture as a detail map.
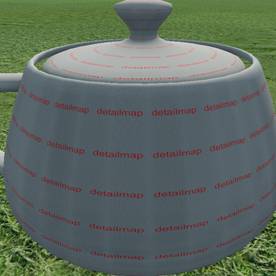
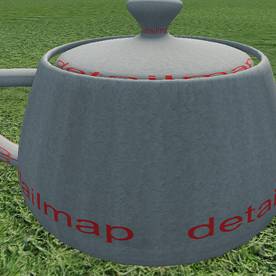
You can easily tile the detail map by using the “tileU/V” function in the sub menu. All other texture maps stay as they are if you adjust the tiling of the detailmap.
Detail bump maps are similar to detail maps with the difference, that they add depth to your material. Detail bump maps are, like normal maps, affected by light.
To use a detail bump map add a tileable normal map to the detail map channel and set the “detail bump map” flag in the “shader generation params”.
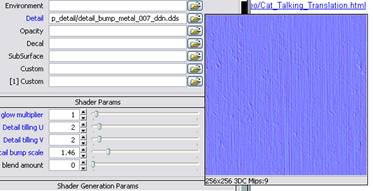
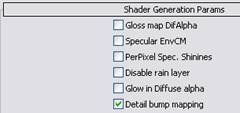
You can adjust the detail bump map settings in the “shader params”.

As detail maps, you can tile detail bump maps.
Detail bump scale defines the bump intensity.
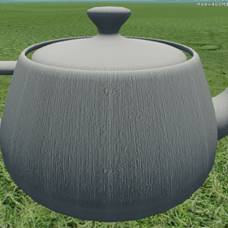
The decal slot has different functions depending what kind of shader you are using. It is working with Ilum / Metal / Cloth shader.
Decal for Ilum and metal shader:
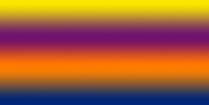
For metal and ilum shader it is linked to the glow feature. You can use it to add animated glow to your material without touching the diffuse map. First you have to add a glow texture to the decal slot in the material editor.
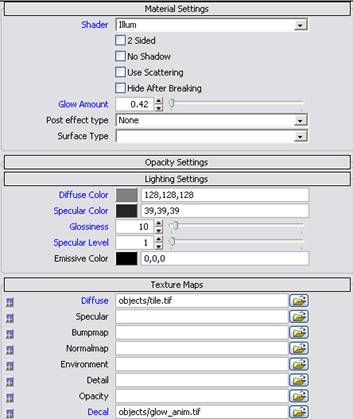
You have to add a glow amount value to make the effect visible. Now you can see the glow texture on your model. You can use both, black/white and color glow textures.
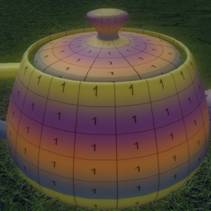
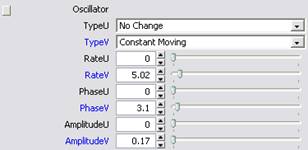
You can also animate the glow texture. Therefore you need to set up the oscillator in the decal slot sub menu.
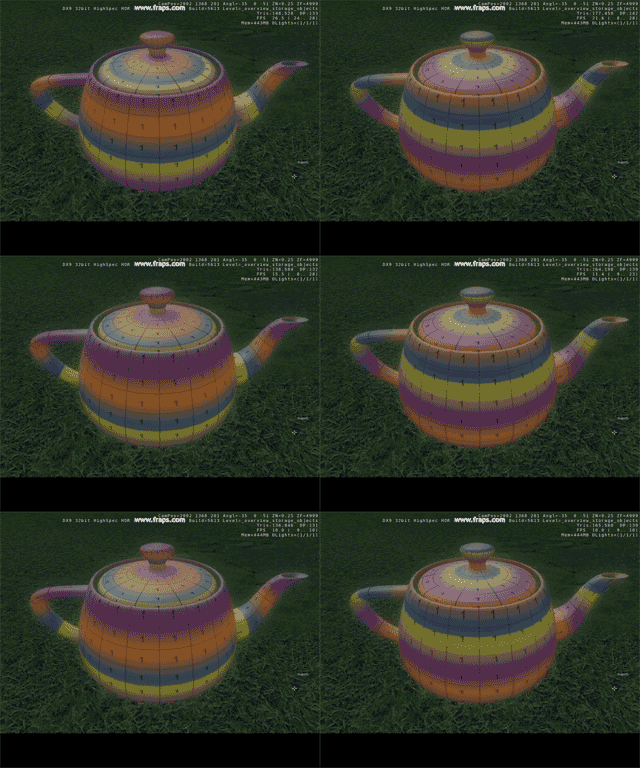
To make the decal glow texture visible on just some specific areas, you have to paint an alpha map for it. Save the alphamap in the alphachannel of the diffuse map.White will represente the area where the glow will be visible, black will hide the glow. Here an example. The area where the glow is visible is controled by a texture stored in the alphachannel of the diffusemap:
Decal for cloth shader:
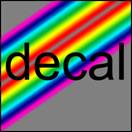
In combination with the cloth shader you occlude or illuminate your model by using an occlusion map as a decal. You can also add dirt to cloths for example. You can use any RGB texture. It will be blended into your diffuse map with a mode that is almost comparable to photoshop’s hard light blend mode.
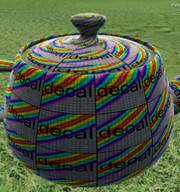
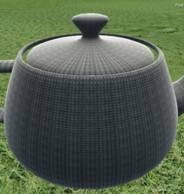
Without decal assigned with decal assigned
The decal you use will be tiled the same way as the diffuse map is tiled. If you change the tiling of the diffuse map you also change the decal tiling.
The opacity function is not working at the moment.
Here you can set up all CryENGINE®2 shaders.
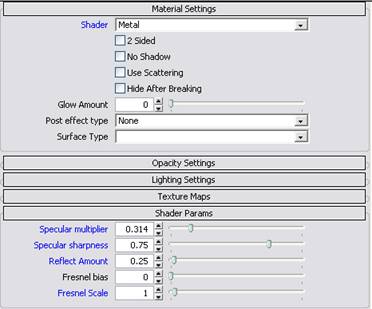
You can adjust, depending on what kind of shader you are using, different things like:
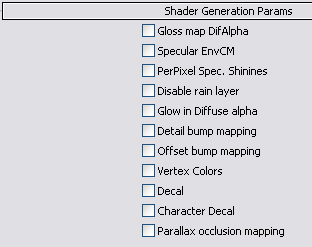
In the Shader generation params menu you can de/active all features a shader offers. In the screenshot you can see all ilum shader features. These are the default shader features, there will be some features added depending on what kind of shader you are using. You can adjust the activated shader in the Shader params menu.
It is quite the same as a specular map with the difference, that the texture is stored in the alpha channel of the diffuse map. You can only use grayscale textures. To activate the “ Alpha channel gloss map ” set the flag in the Shader generation params .

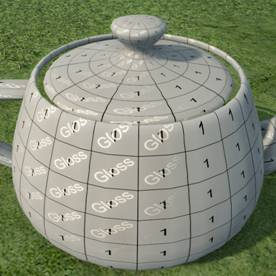
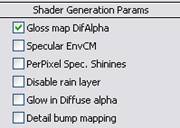
See “environment map”
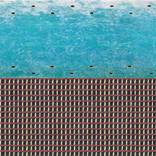
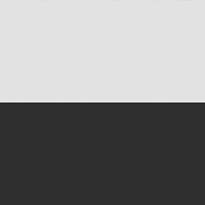
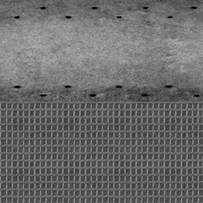
On the left side is the specular map with a simple glossiness intensity map in the alpha channel (right). The darker color below means that this part will have a smaller glossiness value than the part above.
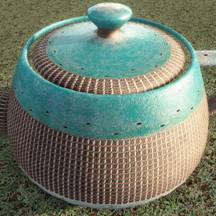
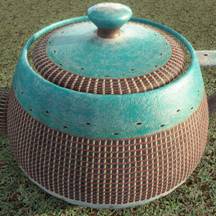

To activate the “Per Pixel Spec Shinies” function you have to set the flag in the “Shader Generation Params”
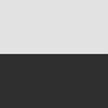
The left picture above shows the material without “Per Pixel Shinies” activated”. The right one shows it with the activated function. You can see that the cloth glossiness value is lower and the specular reflection is much wider in this area, because the value set for this area is darker than the metal area.
You can disable the rain layer for your material by setting the flag.
It is comparable with “Gloss in Diff Alpha”. In this case the glow map is stored in the alpha channel of the diffuse map. Save your diffuse map with a grayscale glow map in the alpha channel and set the flag in the “Shader generation params” to activate this function.
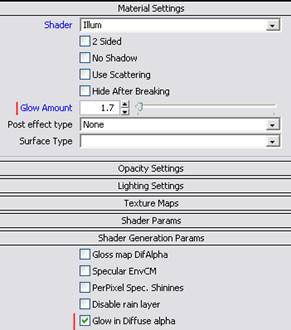
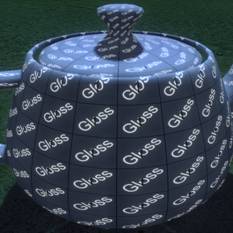
You can adjust the intensity in the material settings with the “ glow amount ” slider.
See “detail bump map”
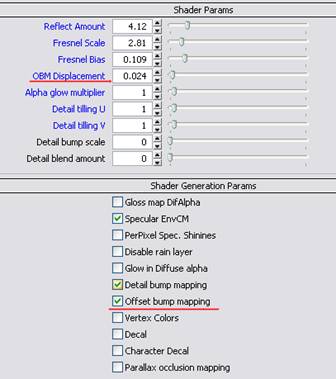
Offset bump mapping is a combination of bump mapping and normal mapping. You can get a better depth effect than with normal mapping. You need a normalmap and a heightmap. The heightmap has to be stored in the alphachannel of the normalmap. To activate offset bumpmapping set the flag in the “shader generation params menu”. To adjust the displacement effect use the OBM Displacement slider in the “shader params menu”.
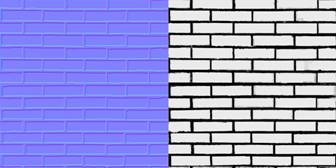
Hightmap has to be in the alphachannel of the normalmap.
Here you can see a normalmap with the heightmap. The dark areas in the heightmap represent the deep areas in the material.
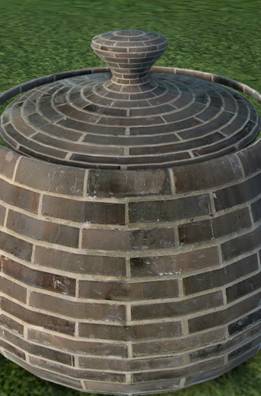
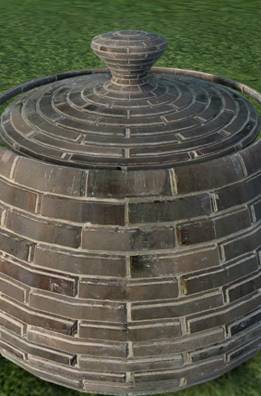
On the left side you see a material without offset mapping and on the left side a material with offset mapping.
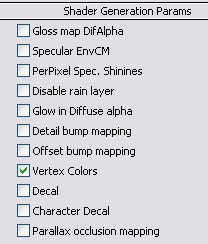
You can display the exported vertex colors of your model by activating this function. You can fake ambient occlusion by using vertex colors, or just add a bit more depth and contrast to your model. Vertex colors have to be added to your model in 3dsMax or any other modeling tool.
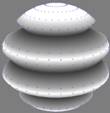
Here a model in max colored just with vertexcolors, no texture assigned.
An example of an object with vertex colors activated:
You can use vertex colors to make the areas in the corners much darker. So you get a pretty fast and cheep ambient occlusion fake especially if you are using tillable textures and you can not paint shadows and light into your texture. You can also bake a light into the vertex color of your object in max.
You activate this function if you use a decal. Decals planes are normally placed very close to other geometry. If you activate “decal” you avoid typical problems when faces are close to each other like flickering and z-fighting. The decal position will be adjusted and the render priority will be changed. In the picture below rust was added to a wall with a decal.
Parallax occlusion mapping is an advanced version of offset mapping. It is also more expansive.
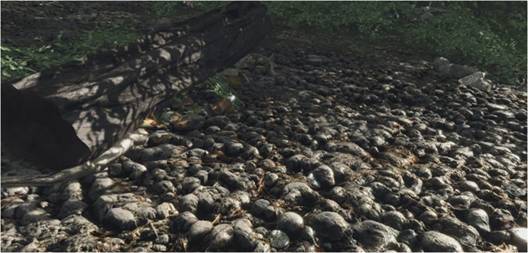
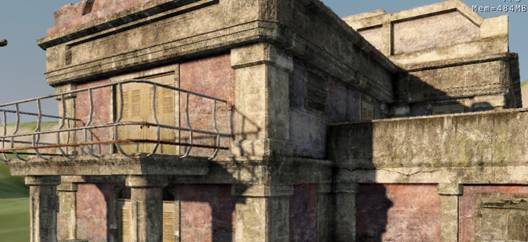
To use parallax occlusion mapping you need to do exactly the same things you have to do to use offset mapping. You need a normal map with a hight map in the alpha channel. The only difference is that you have to set another flag in the “Shader Generation Params”.
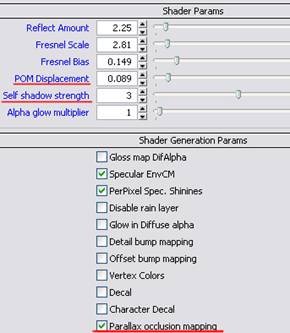
Here you can also adjust the parallax occlusion effect. POM displacement sets the intensity of the POM effect. Self shadow strength sets the brightness of the shadows.
Parallax occlusion mapping works fine on flat surfaces like terrain and walls for example.
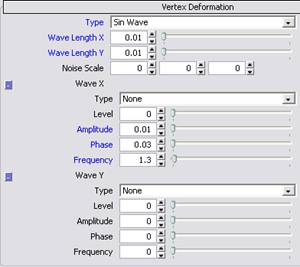
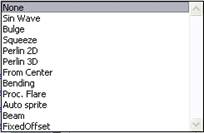
You can adjust the vertex deformation separately for the x and y axis.
Wave length x/y: This value sets the wave length of the wave the deformation is based on. A good default value for the wave length is 1.
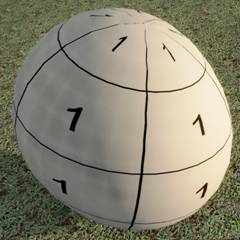
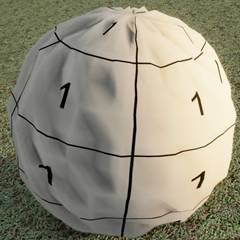
On the left side you can see a deformed sphere with a wave length of 0.01. On the right side you can see a deformed sphere with a wave length of 1.
You maybe have to play around with the settings a bit, to get the desired result.
You can add different layers to your material in this menu.

Frozen layer: Frozen layer that is used in Ice levels. Your object will have snow on top and frost on the sides. It is normaly used for static objects. If an object is rotating, the layer won’t rotate and the snow will always face into Z-direction.
Dynamic frozen: Frozen layer for dynamic objects. Snow will no always face in positive Z-direction. If an object is rotating, the layer will rotate as well.
Wet layer: Will add an animated texture to your model that fakes water dripping on the model.
Cloak layer: Will activate the nanosuit cloak effect for the object.
Example of an object with wet layer assigned:
