
The following section describes each pull down menu option and its function within the facial editor.
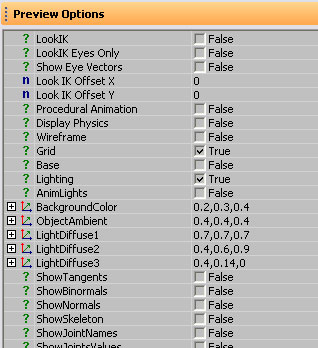
Preview Options contain a list of functions from debug display modes to general display options.

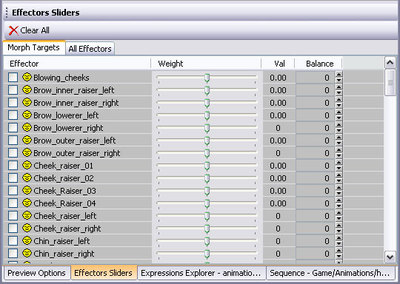
Effector – Displays the name of the morph targets stored within the character. The checkbox next to the name of the morph enables and disables the effect of the weight slider.
Weight – Slider to move the morph target from neutral position to negative or positive values.
Val – Displays the position value of the slider in numerical form.
Balance – Control the balance factor or symmetry or the morph.
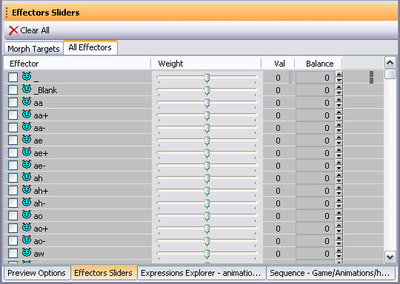
Effector – Displays the name of the effectors available from morph targets to composed expressions. The checkbox next to the name of the effector enables and disables the effect of the weight slider.
Weight – Slider to move the effector from neutral position to negative or positive values.
Val – Displays the position value of the slider in numerical form.
Balance – Control the balance factor or symmetry or the effector.
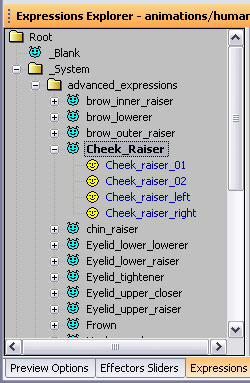
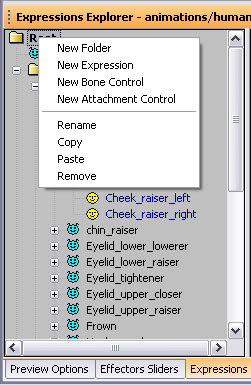
Expressions Tree View – Right Click Menu
New Folder – Create a new folder.
New Expression – Add existing morph or create a new expression.
New Bone Control – Create a new bone controller or channel through which bones within the character can be animated.
New Attachment Control – Create an expression that rotates an attachment (not supported for skin attachments).
Rename – Rename an expression or folder.
Copy – Copy an expression.
Paste – Paste an expression.
Remove – Remove expression or folder.

Plays the morph/expression sequence.

Toggles play button to start at -1.0 (off) or from 0 only (on).

Set slider position to 0.

Set slider position to -1.

Set slider position to +1.

Top slider sets expression from -1.0 to 1.0.

Lower slider sets balance from -1.0 to 1.0.

Spline Display. Defines how morph shapes blend in over the time an expression (multiple morphs) transition from minimum amplitude to full amplitude.
Sequence view displays all related information about the sequence from expressions, to audio and the curves/keyframes themselves.
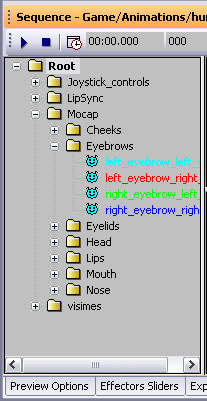
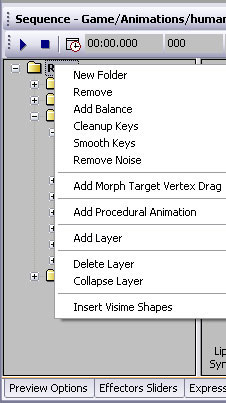
Sequence View – Right Click Menu
New Folder – Create a new folder.
Remove – Remove element such as a folder or an expression.
Add Balance – Add balance track that controls asymmetry.
Cleanup Keys – Reduce keys based on threshold set by user.
Smooth Keys – Function to smooth over noise. Mostly used for mocap data.
Remove Noise – Function to remove noise. Mostly used for mocap data.
Add Morph Target Vertex Drag – Unsupported.
Add Procedural Animation – Unsupported.
Add Layer – Add layer useful for modifying large amounts of sequential keys.
Delete Layer – Delete layer.
Collapse Layer – Commit changes made within a layer to base curves permanently.
Insert Viseme Shapes – Mode in which morphs can be entered in text form to produce overlapping shapes which blend in and out of one another. This is useful for producing fast layouts of visemes for keyframed lip sync. Expressions must have “visim” as a prefix in the name.
Curve Track

Curve Track – Key Bar (highlighted in red below) The key bar displays any keys within the selected track which can be manipulated in the same way as in the main curve view, though locked to the horizontal axis. This is useful for scaling time of a group of keys without accidentally altering amplitude.

Curve Trac – Amplitude (highlighted in red below) Amplitude displays the entire range accessible for a particular expression or joystick control. Though depending on actual setup ranges below zero may not necessarily have any effect.

Curve Track – Curve Display (highlighted in red below) The curve display shows both the curve of the selected track as well as the keys themselves.

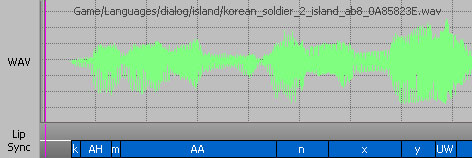
Audio Track – Right Click Menu
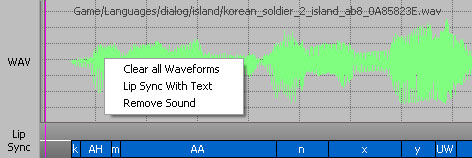
Clear all Waveforms – Removes all wav forms from the track. Lip Sync With Text – Opens dialogue where text can be entered which matches the spoken audio and will generate an appropriate list of phonemes. If left empty the plugin does it’s best to guess the phonemes necessary. Remove Sound – Removes wav file from sound track.
Audio Track – Label Bar (highlighted in red below) Labels the wav and lip sync portions of the audio track.
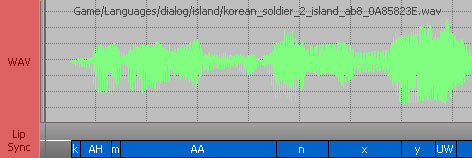
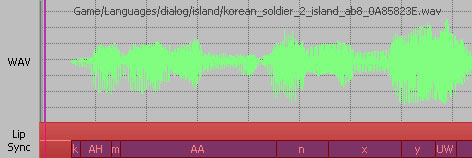
Audio Track – Lip Sync Bar (highlighted in red below) The lip sync bar displays the morphs which have been added through a referenced recording list, or through the “lip sync with text” option. The bar is split into 2 sections. The upper section stores the words that may have been entered to guide the lip synch extraction process and the lower half shows the phonemes that have been used to create the extracted lip synch.
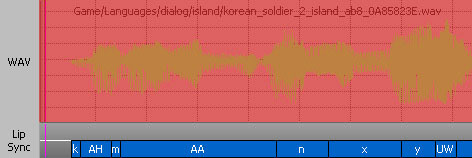
Audio Track – Wav Display (highlighted in red below) Displays wav files added to the sequence in graphical form as well as the file name and it’s location on disk.


Play Sequence – Plays the sequence

Stop Sequence – Stops playback of the sequence

Facial Sequence Properties – Displays start and end times of the sequence or enables

Current Sequence Time – shows current sequence time.

Current Frame No – Shows frame number at current time.

Playback Speed – Shows current playback speed in percent.

Animate Skeleton – Plays back selected animation on the character.

Sequence Camera – Plays back camera animation loaded from a “sequence object” saved from a cinematic in trackview.

Overlap Sounds – Allows sounds to overlap when they have been placed in an overlapping fashion. When it is off, sounds are trimmed when a new sound begins to play.


Key All – Creates key for every track selected in tree view.

Zero All – Sets keys for selected tracks in tree view to 0 amplitude.

Amplitude – Adjusts amplitude of curve for a selected range.

Smooth – Smoothes noise of selected keys. Useful for mocap.

Smooth Value – Sets the value used for the smoothing operation.

Cleanup Keys – Removes keys based on user defined threshold.

Cleanup Keys Value – Sets value for cleanup operation.

Remove Noise – Attempts to remove noise based on user defined threshold.

Remove Noise Value – Sets value for remove noise operation.


Reset all tangent settings.

Set the incoming tangent to 0.

The spline evaluates to a constant value until it gets to this key.

Allow the spline not to be smooth as it reaches this key.

Set the outgoing tangent to 0.

The spline evaluates to a constant value after this key.

Allow the spline not to be smooth as it leaves this key.

Zoom Extents horizontal

Zoom Extents vertical

Grid snap horizontal

Grid snap vertical
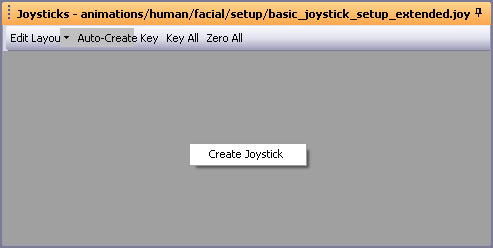
Joysticks are user defined 2d controllers with a single manipulator that can be assigned to multiple morphs, expressions or other shapes in order to animate them in a graphical way – much like moving a physical joystick.
The Joystick view is where the user can start assembling joysticks and wire them up to morphs, expressions or visemes that have been made available in the sequence view.

Toggle edit mode to resize or move joysticks in the view.
Toggle create key mode, when a controller is moved a key is automatically created.

Key all joystick tracks.

Zero amplitude of all joysticks.
Joystick Right Click Menu
Create Joystick – Creates a basic joystick without any active connections.
Joystick Right Click (no expression selected in tree view)
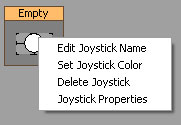
Edit Joystick Name – Renames joystick.
Set Joystick Color – Alters color of joystick.
Delete Joystick – Removes the joystick permanently.
Joystick Properties – Views properties page of joystick.
Joystick Right Click (expression selected in tree view)
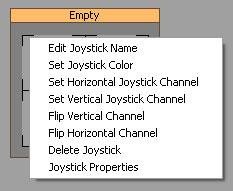
Edit Joystick Name – Renames joystick.
Set Joystick Color – Alters color of joystick.
Set Horizontal Joystick Channel – Assigns selected expression in tree view to the horizontal channel of joystick control.
Set Vertical Joystick Channel – Assigns selected expression in tree view to the vertical channel of joystick control.
Flip Vertical Channel – Inverts the control of the Vertical axis.
Flip Horizontal Channel – Reverses the control of the horizontal axis.
Delete Joystick – Removes the joystick permanently.
Joystick Properties – Views properties page of joystick.
Joystick Properties
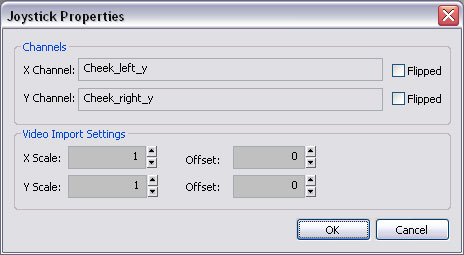
Channels Group
X Channel – displays the expression assigned to the X channel.
Y Channel – displays the expression assigned to the Y channel.
Flipped Checkbox – Inverts the X or Y channel.
Video Import Group
X Scale – Scales X component upon import.
Y Scale – Scales Y component upon import.
Offset – Offsets X or Y component upon import.
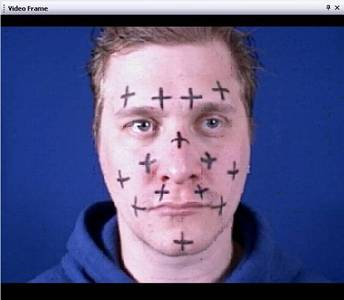
The video frame displays video loaded through the sequence menu in 2 ways. Either individual videos can be loaded using the “Load Video (Ignore Sequence)” option, or by explicitly loading both captured data (from the Faceanim tool) and video using the “Load Video Extracted Sequence” option.